Before I knew these drawing exercises to improve my drawing skill, my drawings lacked accuracy and proportion.
I remember feeling frustrated, thinking my drawings would never look as good as I wanted them to.
But after practicing these exercises, everything changed. Let me show you how these exercises can take your skills to the next level!
If you prefer to watch instead of read, take a look at this video below – and if you liked what you see, give it a Like, subscribe to The Portrait Guru and comment! Would love to hear from you!
Hope you enjoy these drawing exercises to improve your drawing skill!
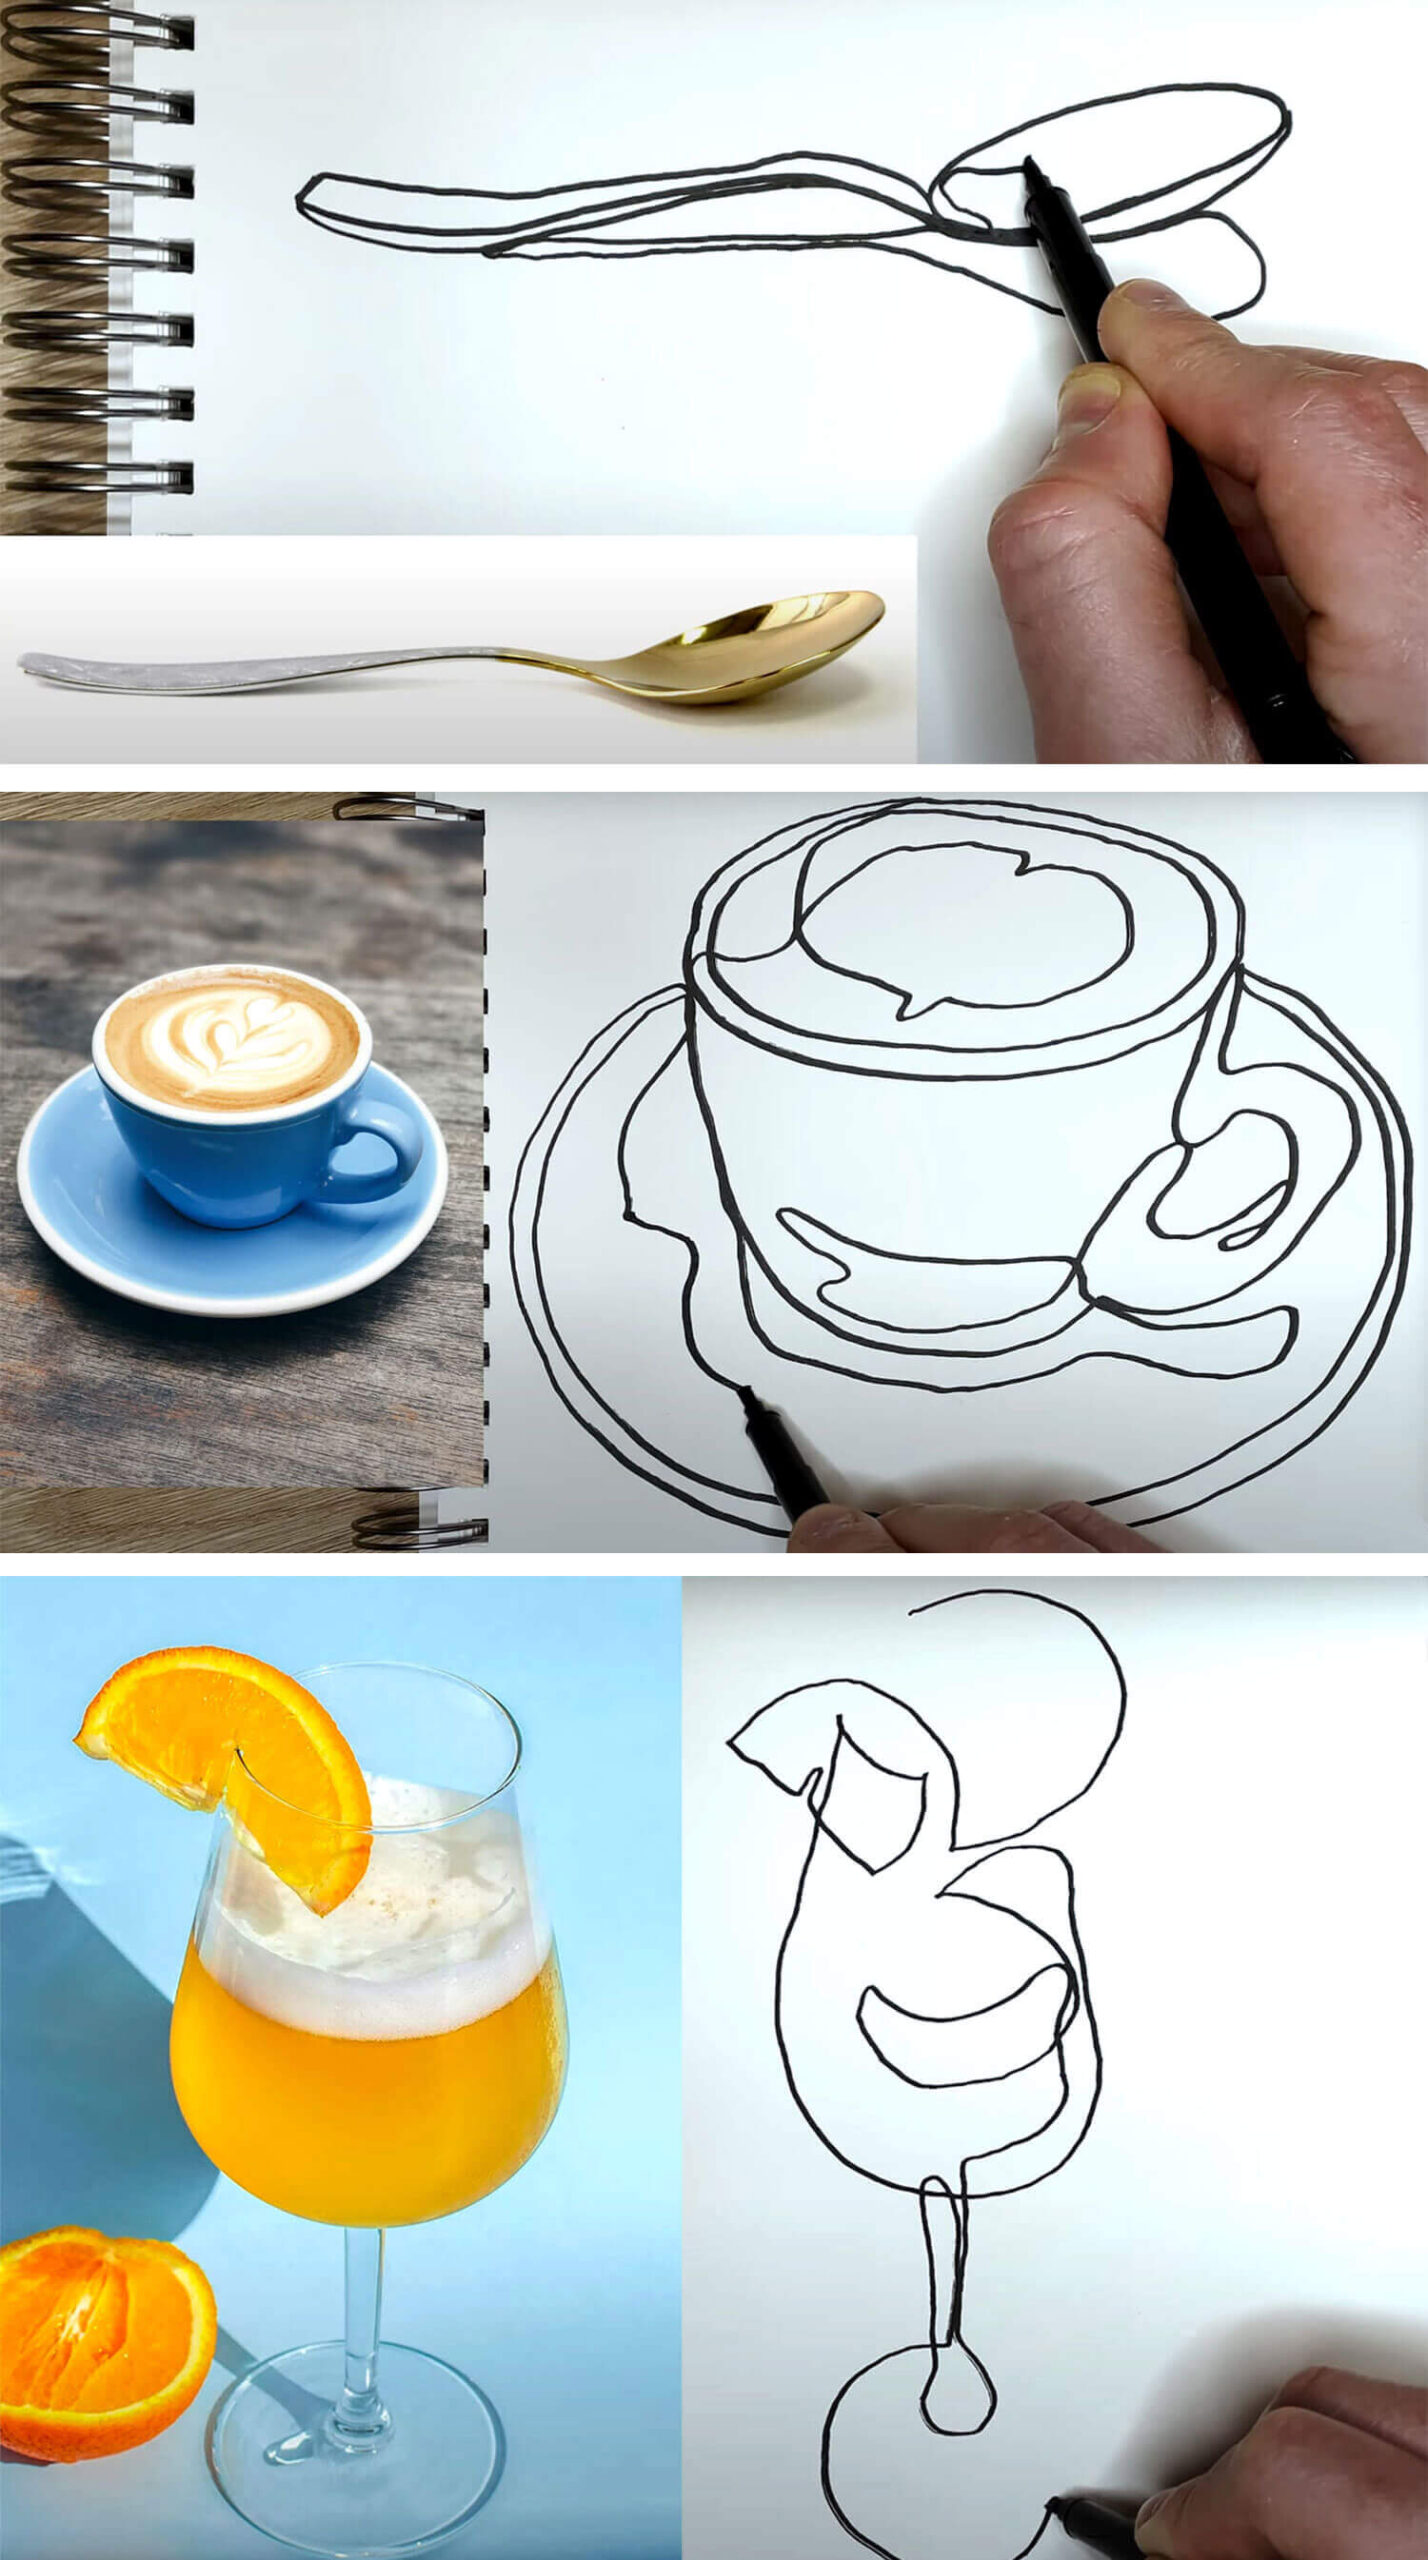
Continuous Line Drawing Exercise – Spoon
When I first started doing continuous line drawings at life drawing sessions at university, I honestly thought they were pointless.
I didn’t understand how drawing a subject without lifting my pencil would help me, but I stuck with it.
Over time, I realised it was a great exercise to improve my overall drawing skill. It helped me focus on what I was seeing rather than what I thought I knew about the object.
This exercise trains your eye-hand coordination by forcing you to focus on what you see rather than what you think you see.

I recommend using a real-life object, but if you don’t have one, you can use a photograph. The important thing is to really study the object, not rush it.
Benefits include:
- Improves observational skills
- Trains eye-hand coordination
- Helps you commit to confident lines
- Reinforces the idea that drawing is about seeing, not assuming
Take your time with this exercise, slow down, and concentrate on drawing what you see. Focus on reflections, edges, and how light interacts with the surface.
Don’t worry if you need to go over the same line twice. This isn’t about perfection, but about improving your accuracy.
Drawing is all about truly seeing what’s in front of you, not just what your brain assumes is there.
The more you train yourself to observe, the more accurate your drawings will become.
Now that you’ve built up your focus and observational skills with continuous line drawing, let’s move on to something that will really test your attention to detail.
Continuous Line Drawing Exercise – Mug
This next step will make you pay attention to how form, shadows, and proportions come together.
When I was new to continuous lines, I couldn’t believe how many details I had missed. This is a classic beginner drawing mistake!

Especially objects like this, I thought a mug was simple, but the more I observed, the more I noticed the complexity – the subtle twist of the handle, how the shadows fall across the surface.
This exercise taught me to slow down, focus, and really pay attention to how light, shape, and space interact.
Benefits include:
- Improves understanding of form and structure
- Encourages careful observation of shadows and proportions
- Builds confidence in capturing details without relying on memory
Use the same technique as in the spoon drawing, but now focus on a mug. Don’t lift your pen or pencil as you draw.
Pay close attention to the saucer, if you’re drawing one, and how the shadows fall. Observe the curves and how they flow into one another.
Pay attention to how the handle connects to the body of the mug.
The more you focus on the subtle details, the more detailed your drawings will become.
So far, we’ve been focusing on observation, but in the next exercise, we’ll work on slowing down your thinking process even further. It’s time to take a step back and let go of control completely with blind contour drawing.
Trust me, it’ll do wonders for your ability to see.
Blind Contour Line Drawing Exercise
Like continuous line drawings, I also used to be very sceptical about blind contour drawing.
I didn’t understand how closing my eyes to my paper could actually help. But the first time I tried it, I was amazed at how much more focused I became on the object.

Yes, the result was messy, but it taught me to trust what I was seeing, and this trust was essential in improving my drawing ability.
In this exercise, you won’t look at your paper at all. Instead, focus entirely on the object. Trust your hand to follow the contours of what you’re observing.
Benefits include:
- Trains you to focus fully on the object
- Helps develop hand-eye coordination
- Builds skills in seeing proportions and shapes more accurately
It’s important to slow down and don’t rush. Try to mimic where your eyes are on your subject, to what you’re drawing.
Really pay attention to the lines and shapes of the object.
Over time, you’ll start to notice improvements in your ability to draw more accurately.
Now that we’ve sharpened our focus, it’s time to dive into something that really helped me take my drawing skills to the next level: measuring proportions.
I promise this is going to change your approach to drawing objects like nothing else. Let’s move on to the apple study.
Observational Drawing Exercise
This exercise was one of the biggest game-changers in my drawing ability. Learning to measure proportions properly allowed me to draw with more precision and accuracy than ever before.
Here’s how you do it: Hold your pencil at arm’s length, making sure to lock your elbow and even brace your arm against your chin or neck to keep your measurements consistent.
Close one eye and use the top of your pencil to align with the top of an apple, then slide your thumb down the pencil to mark the bottom.
That’s your unit of measurement.

Now, compare that measurement to other parts of your composition. How many “apple heights” wide is the setup? How does one apple compare to another?
But don’t just measure vertically – measure horizontally too. Look at where the top of the front apple sits compared to the apples beside it. Imagine a horizontal line extending from its top.
Benefits include:
- Strengthens your ability to judge proportions and spatial relationships accurately.
- Trains you to compare objects in relation to each other rather than relying on guesswork.
- Enhances observation skills, helping you see subtle differences in alignment and form.
- Builds a solid foundation for freehand drawing by improving measuring techniques.
Does it align perfectly with the apple next to it, or is it lower?
What about the bottom of that apple – how does it compare to the base of the one beside it?
You should notice that while the top of the front apple is lower than the apple to the right, its bottom extends further down.
Now look at the stem of the front apple. Imagine drawing an invisible vertical line upward – does it intersect with the apple behind it? You’ll likely see that the stem lines up with the top of the apple at the back.
These relationships between objects are key to getting accurate proportions.
Take your time with this exercise.
Measuring like this will help you develop a keen eye for proportions and spatial relationships. The more you practice, the more natural it will become.
Once you get comfortable with measuring, you can move on to exercises that help loosen up your accuracy…
Building A Drawing With Simple Shapes
By breaking down an object into basic shapes – like circles, cylinders, and rectangles, this is an incredibly useful way to approach even the most complex items.
This exercise teaches you how to simplify complex objects by seeing them as basic shapes
Start with a circle for the body, a smaller circle for the handle, and a cylinder for the spout. As you go, use what you’ve learned in the previous exercises about proportions and accuracy.
This approach makes complex objects much easier to draw.

Once you have the foundations in place, you can then add details to the overall drawing.
Now that we’ve built up our ability to simplify shapes, it’s time to put everything together in a more challenging drawing: a shoe.
Benefits include:
- Teaches you to break complex objects into simpler shapes
- Develops spatial awareness and proportion skills
- Helps improve accuracy in capturing complex forms
This will allow you to combine all the skills we’ve practiced and apply them to something more dynamic.
Now that we’ve worked through drawing exercises to improve your drawing skill, it’s time to put everything together.

Drawing a shoe can be tricky, but by applying everything you’ve learned, from measuring proportions with your pencil, to observing details, and simplifying forms into basic shapes – you’ll be able to approach this with confidence.
Benefits include:
- Combines skills learned in earlier exercises
- Strengthens ability to observe and measure proportions
- Builds confidence in tackling more complex subjects
Focus on the overall shape and proportion, then break the shoe down into basic shapes as we did with the teapot. Don’t forget to pay attention to shadows and small details that help bring the shoe to life.
Which drawing exercises to improve your drawing skill was most valuable? Let me know in the comments! If you found this useful, make sure to head on over to my YouTube channel, give this video a Like and subscribe for more drawing exercises and tutorials.
Now that you’ve worked through these exercises, try to apply them when drawing real-life objects or even in your sketches.
The more you practice, the more natural accuracy and proportion will become in your drawings. Remember: drawing is a skill that improves over time, and every mistake is part of the journey. Don’t rush it, let the process work for you.
Want to take your artistic skills even further? Check out my other blog posts packed with insights and practical advice!
Discover 3 Mammoth Habits To Help You Think Of Outstanding Ideas to spark creativity!
Dive into How To Improve Your Portrait Drawing for essential techniques
Explore What To Practice To Get Better At Drawing to build a solid foundation.
Keep learning, keep drawing, and keep pushing your skills to the next level!
Many thanks for listening and visiting my blog today, all about drawing exercises to improve your drawing skill. You can follow what I’m up to on my Twitter, Facebook, or Instagram pages, I’ll really appreciate it if you do, and don’t be afraid to say hi to me! Many thanks again, and have a great day!

 31st March 2025
