In today’s article you’re going to learn how to shade with a pen, ideal for beginners.
I’ll cover several shading techniques, when to use them, the famous artists that used each one to help inspire you, and how long to practice them to enhance your drawing skill.
Stick around for five action tips at the end of this blog post to level up your shading game.
Stippling
Stippling uses dots placed at varying densities to create shading and texture.
This technique is great for adding depth to areas like shadows or textured surfaces. The closer the dots, the darker the tone; the farther apart, the lighter.
I would suggest you draw a simple object, like an apple or even a circle, and applying this method.
Try and put a light source close to the object, so you can really see how the light changes. For the light areas, use the stippling technique sparingly, and then for the darkest areas, make it more condensed.

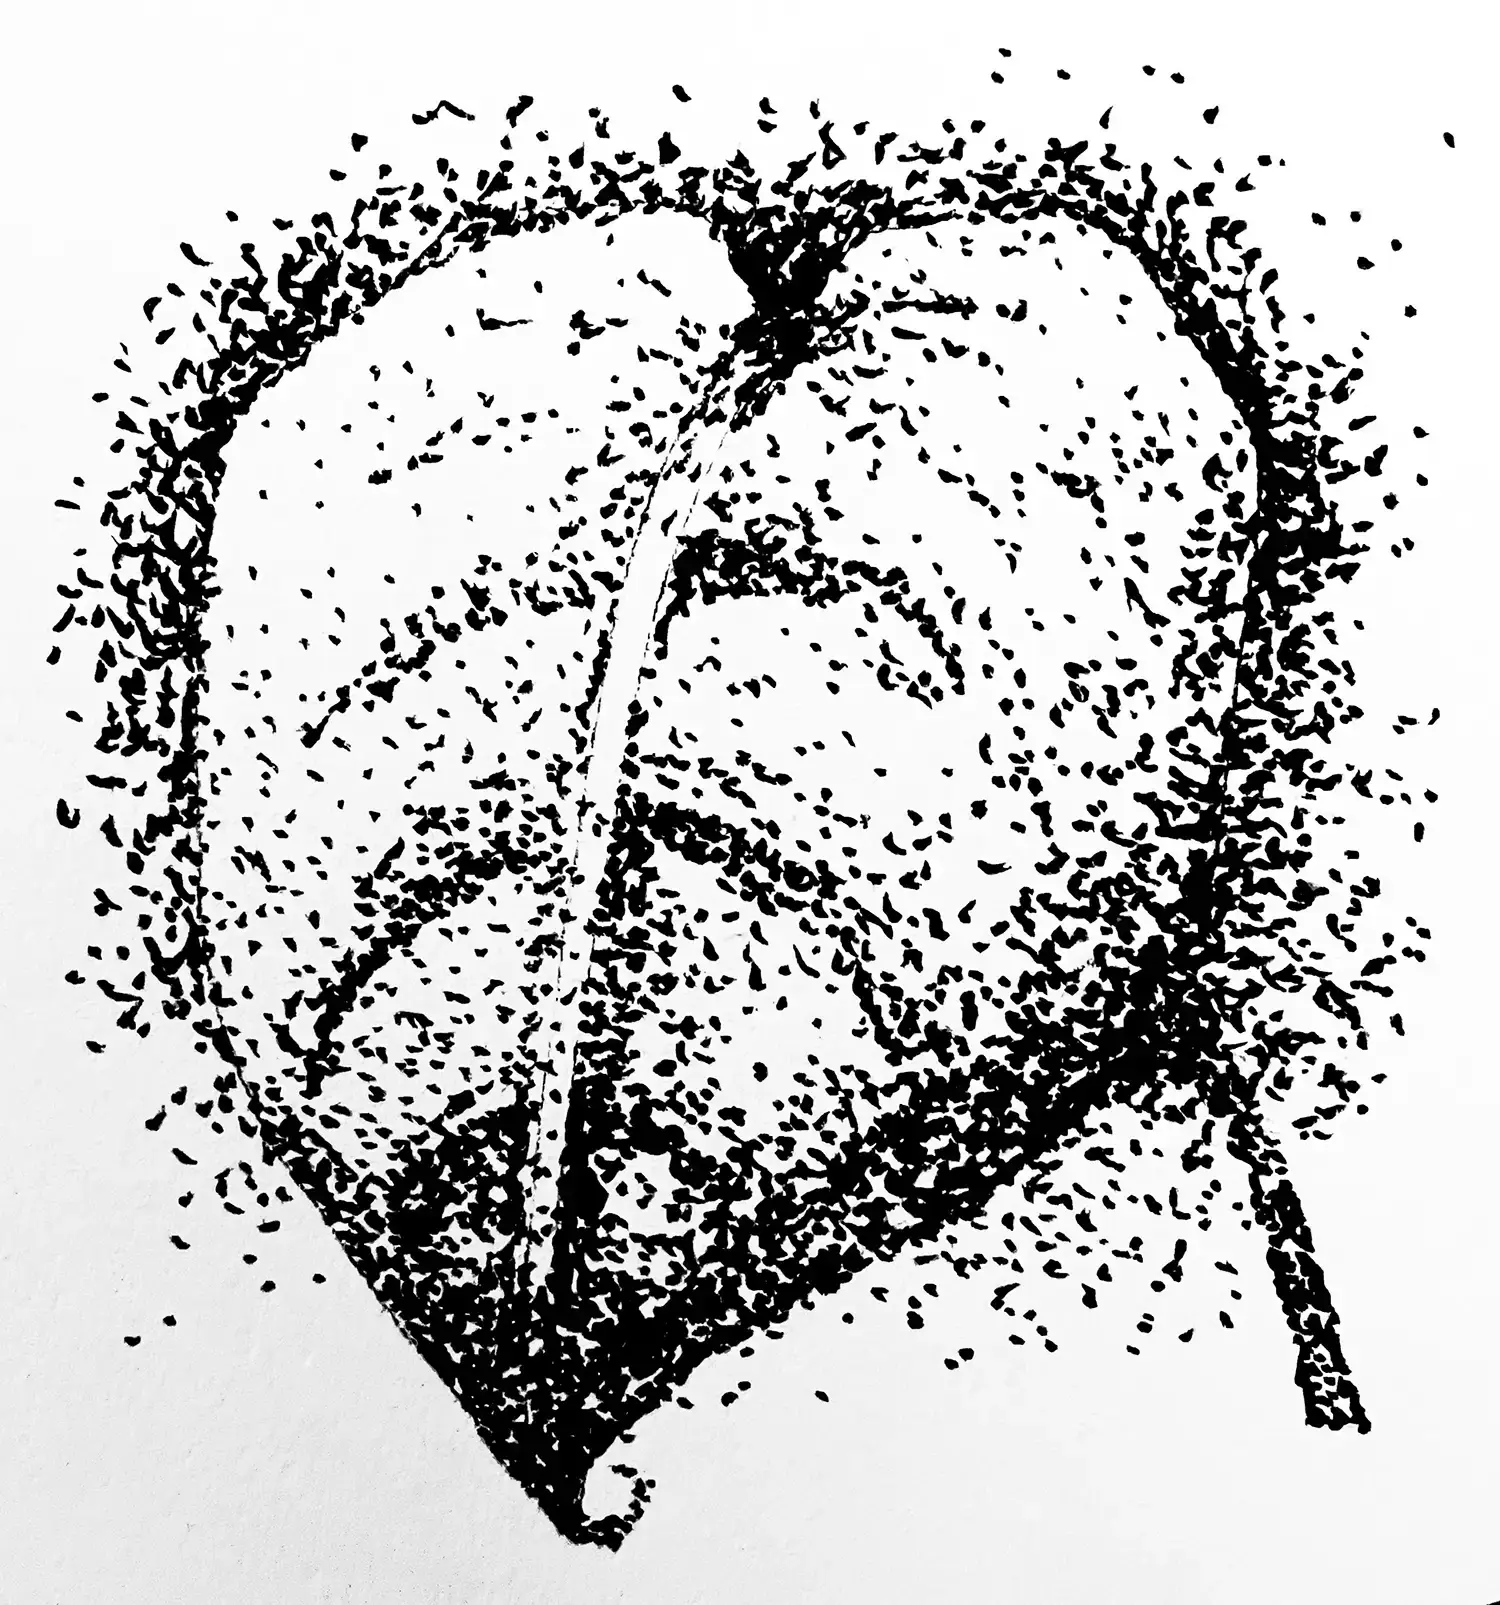
This technique is perfect for detailed work and can be applied to almost any drawing. It adds precision and creates a rich texture, elevating the overall quality of your artwork.
Check out Paul Signac’s work for a masterclass in stippling. While he’s best known for his Pointillist paintings, his drawings also showcase his skill with this technique.
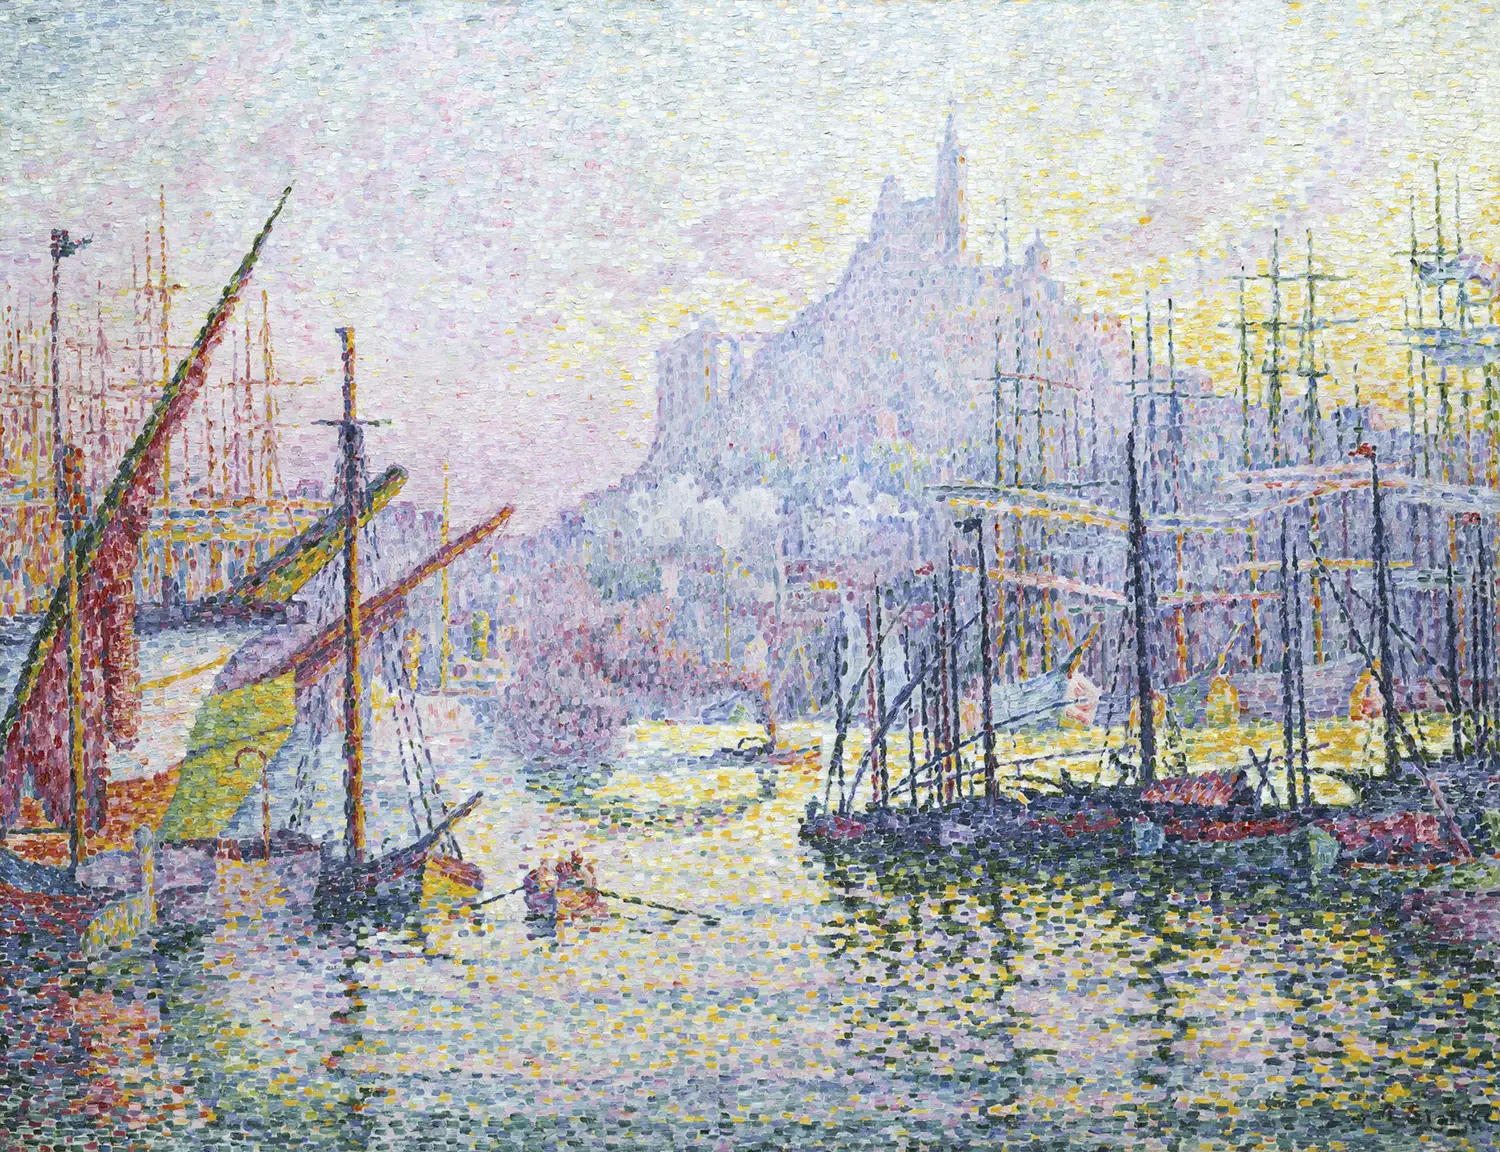


Signac used small, precise dots to build up light, shadow, and texture, creating depth and vibrancy.
Practice for about 15–20 minutes to build precision and sometimes most importantly, patience.
Cross Hatching
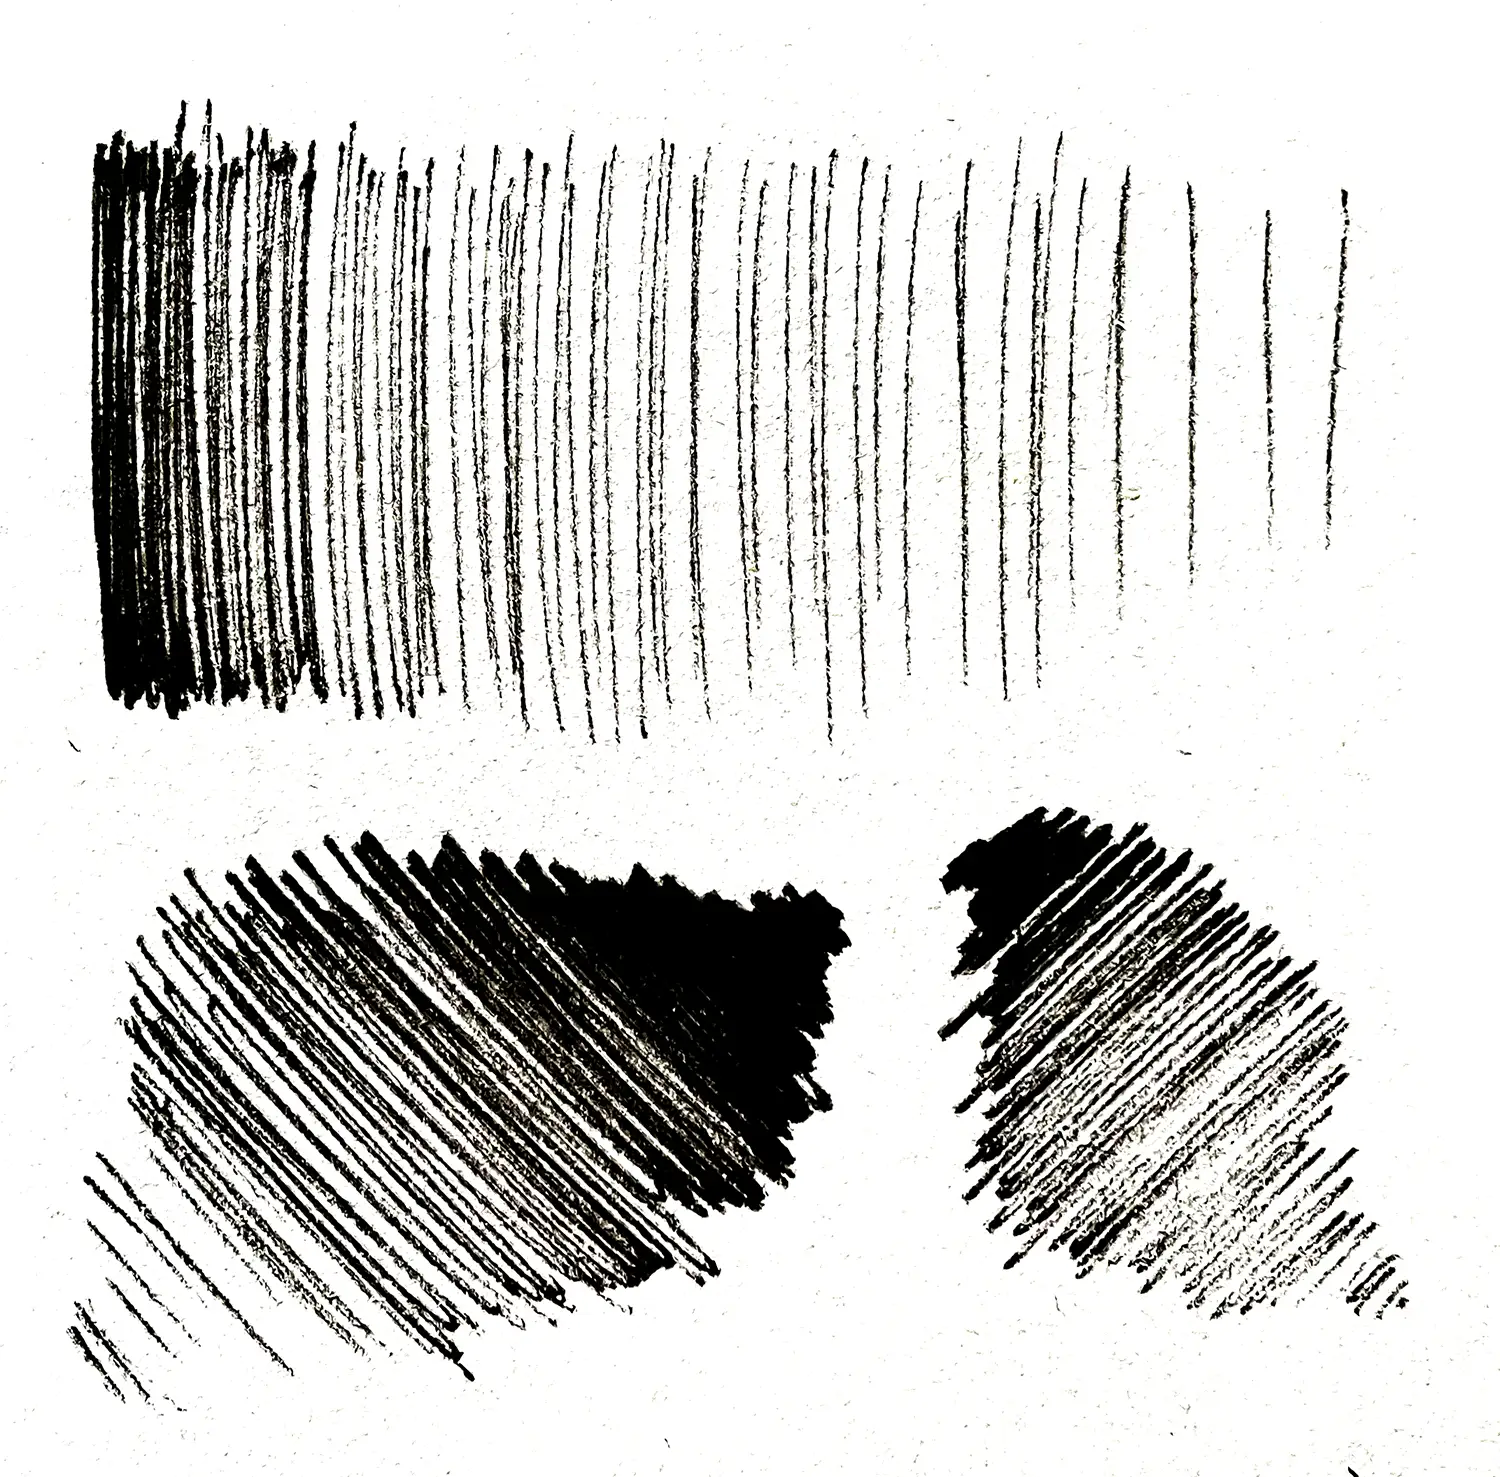
This is the most common of shading techniques.
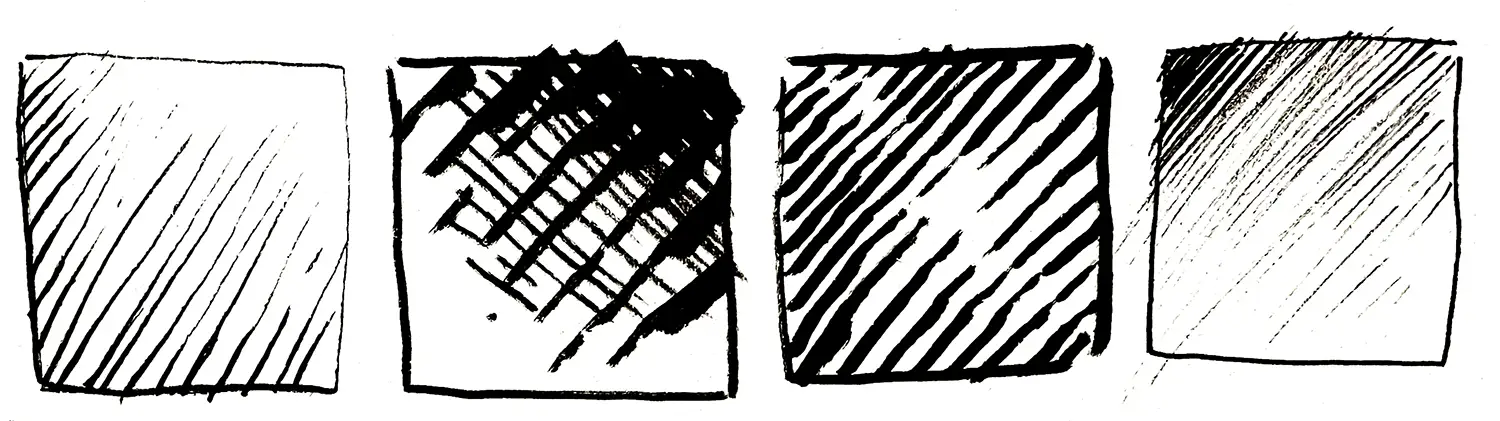
Cross hatching involves layering lines vertically, horizontally, and diagonally.
Again, it’s ideal for a lot of drawings, and I use this technique the most out of them all. Use single hatching for light areas, double for mid tones, and three or four levels of hatching for your darkest areas.
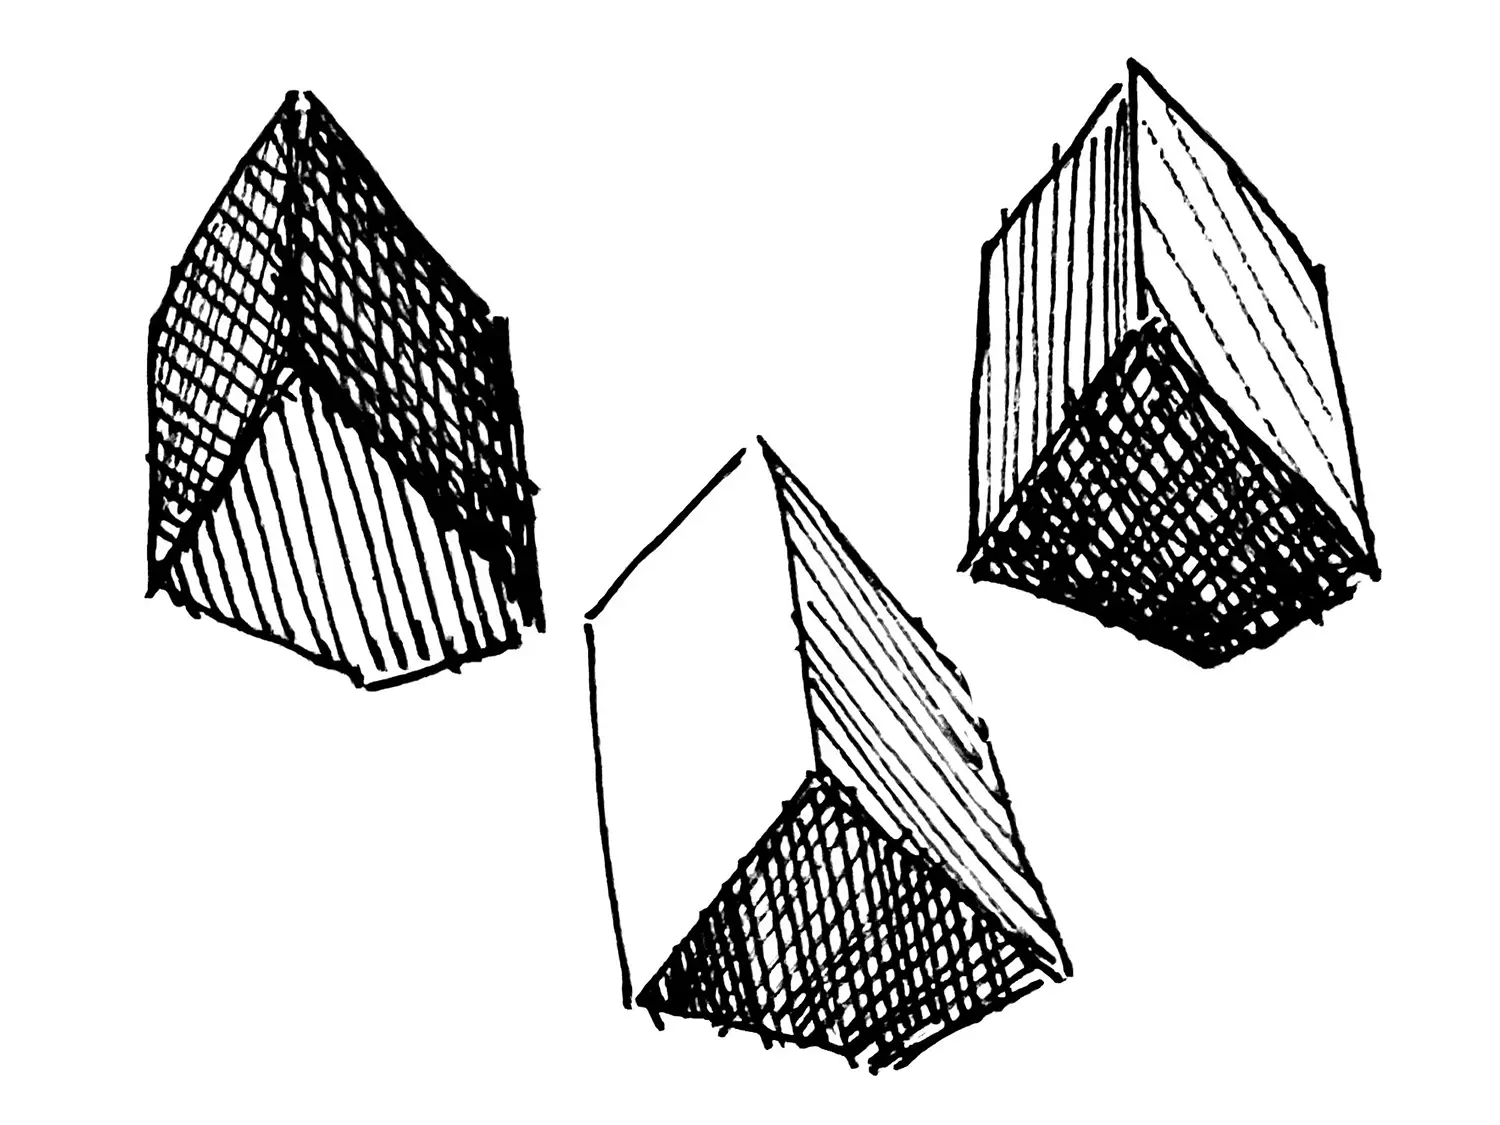
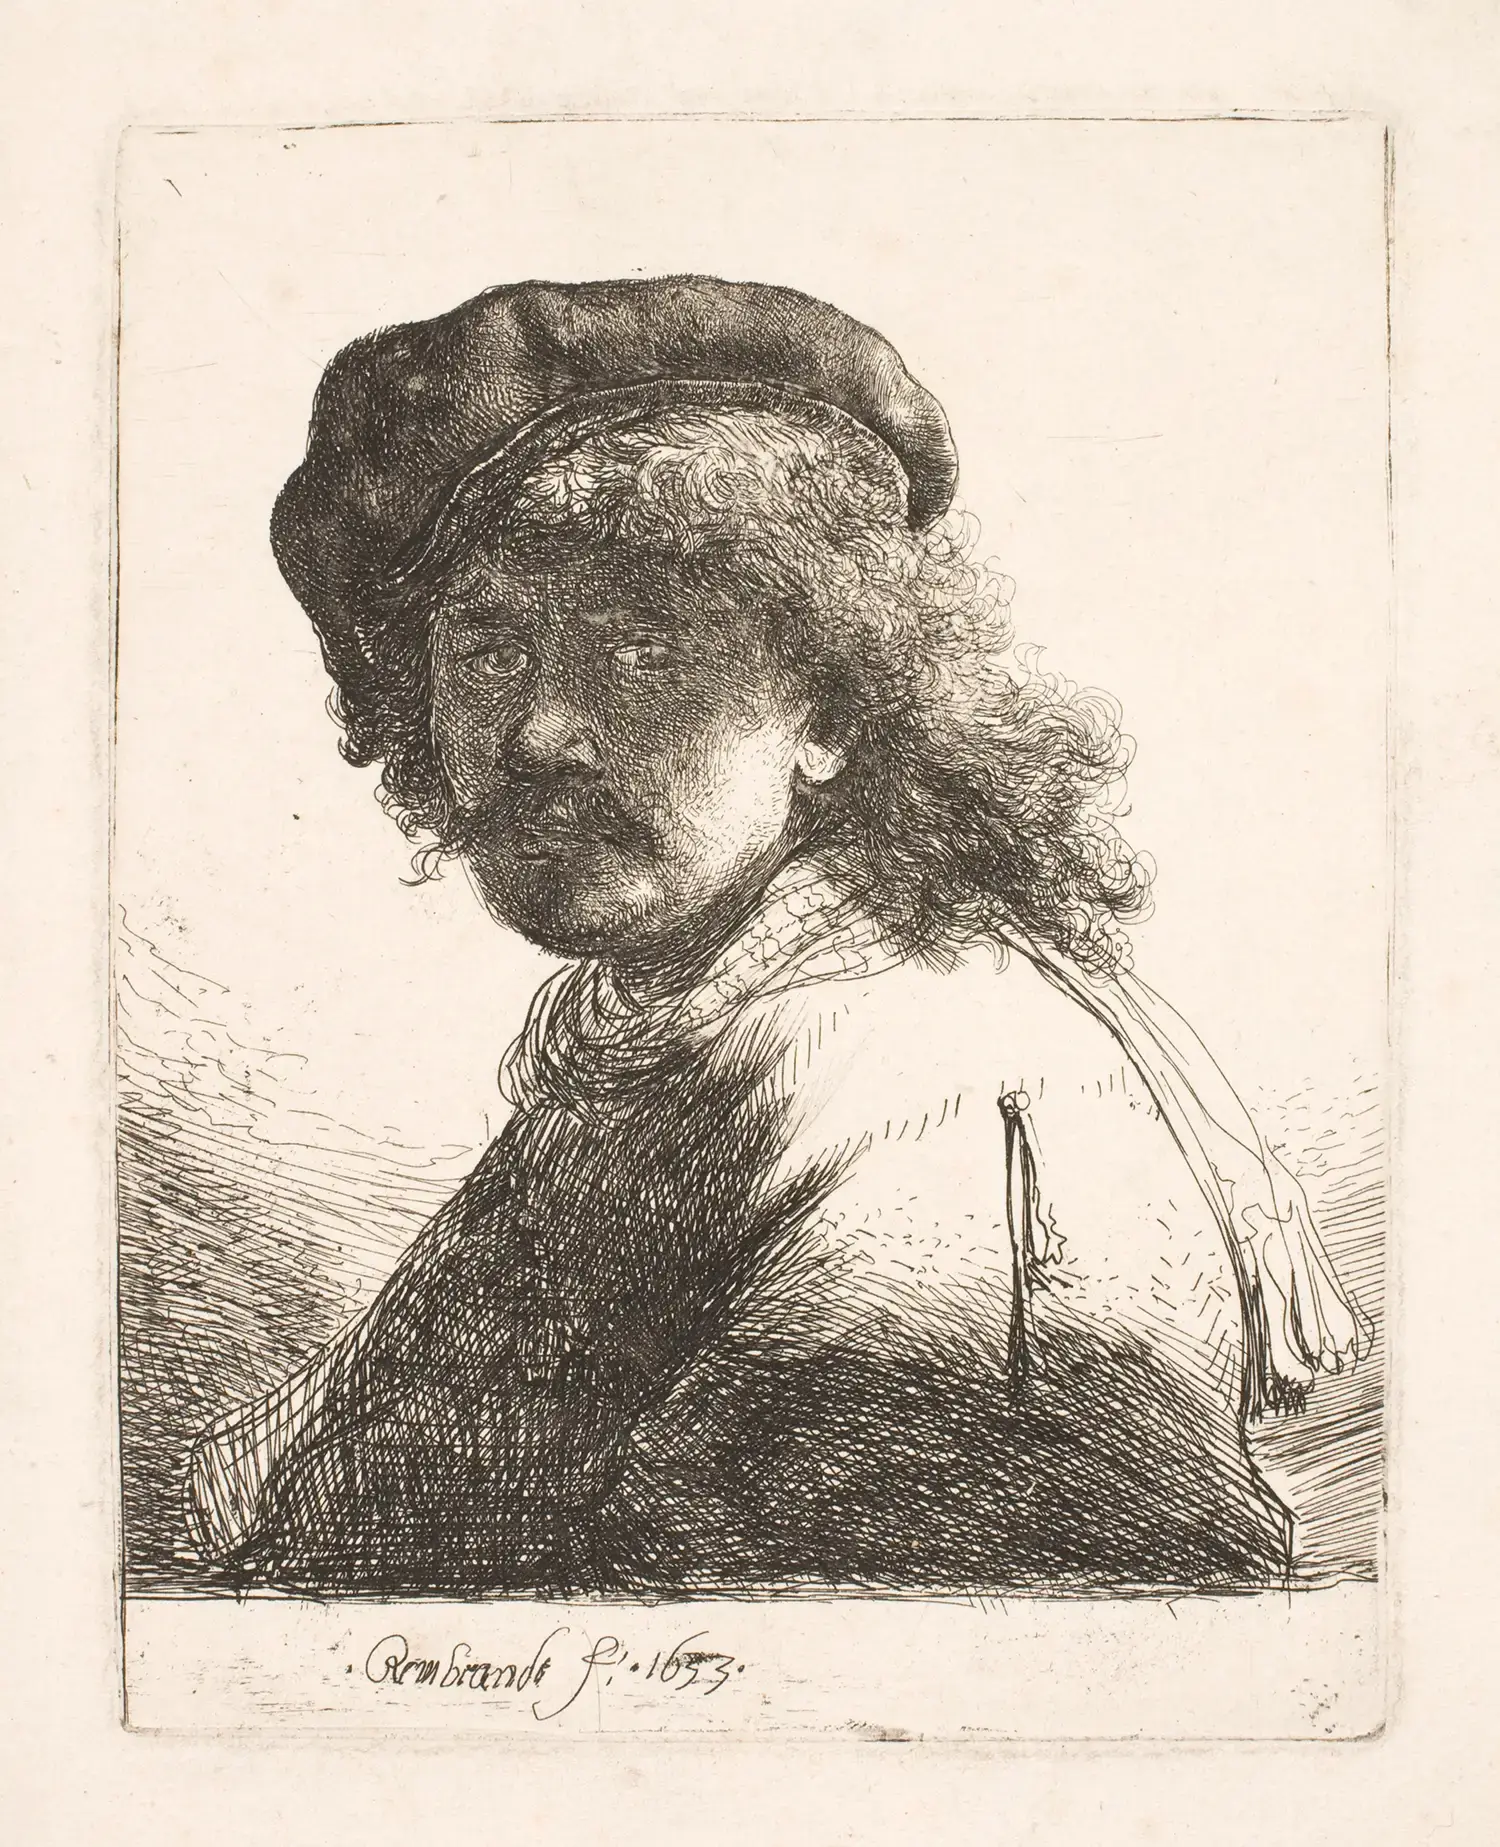
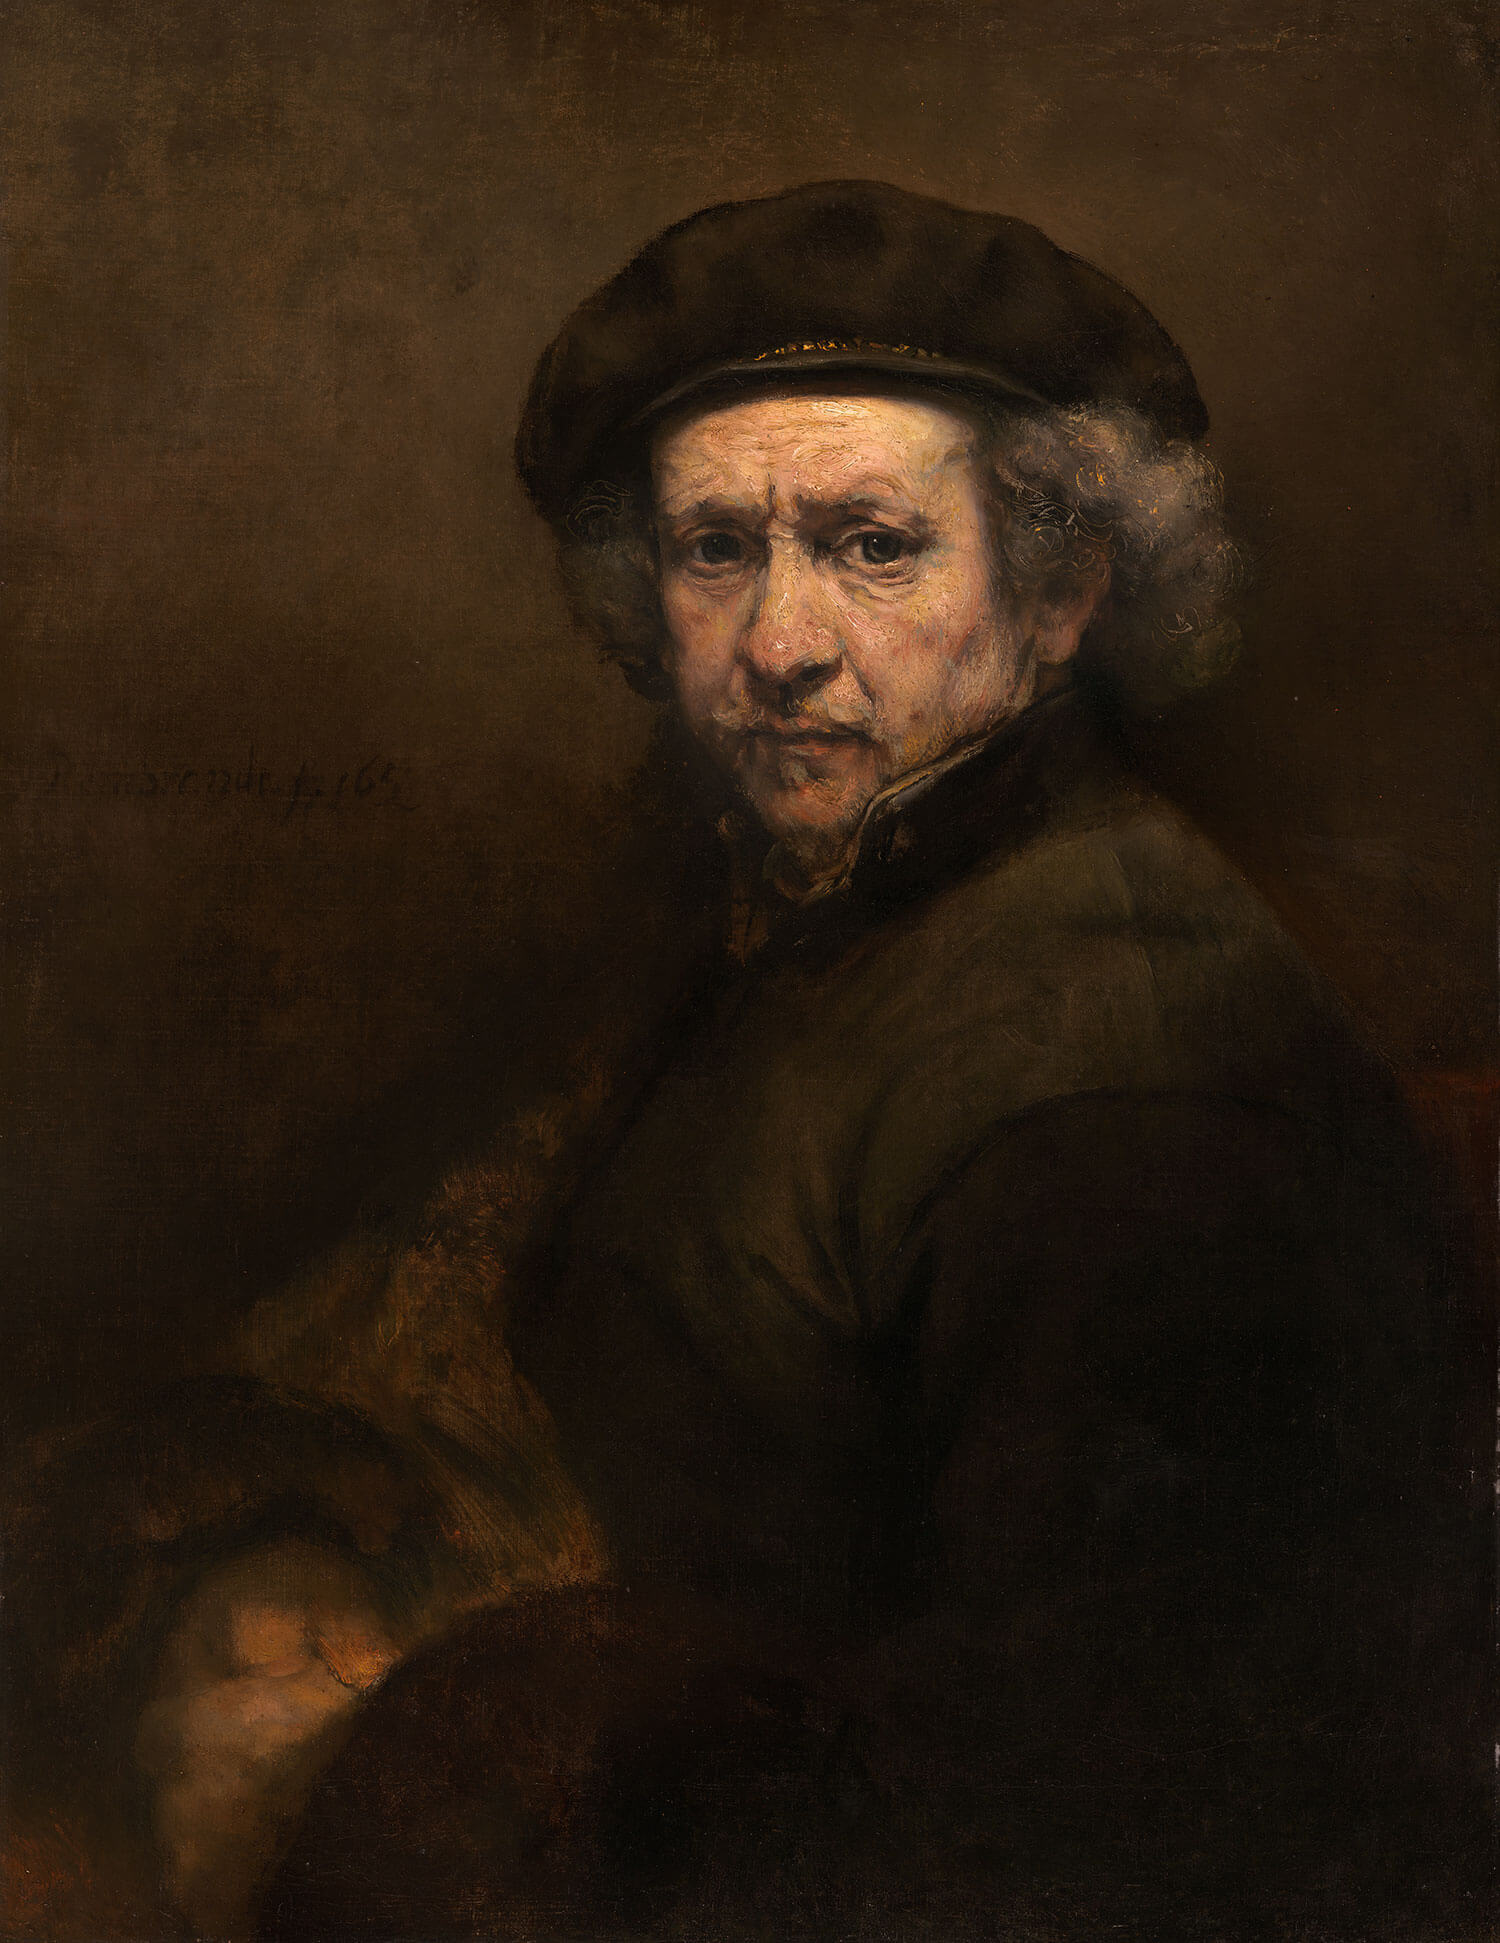
Perfect to offer a textured or dramatic effect, like fabrics or architecture. Take a look at Rembrandt’s drawings to see how he used cross hatching within his work.

You can practice this by simply drawing a 3D box and applying this technique. Make one side light using single hatching, one medium using double hatching, and then one side dark using multiple hatching, what sort of different boxes can you crease?
Or choose a reference that is simple, like a cup, an eraser, or book, and build up your tones using this method.
Spend 10–15 minutes practicing consistent spacing and varying line pressure for tone variation.
For more specific drawing exercises, check out this video — it’s packed with tips to help you improve your drawing skills!
Overlapping Swirls
Overlapping swirls are essentially controlled scribbles that create texture and tone.
This technique is ideal for creating soft, organic textures like hair or foliage.
Try practicing it by drawing a simple portrait and focusing on the hair, or experiment with it inside a small square for more control.

Similar to stippling, you can overlap your lines to build depth and tone, using fewer lines for lighter areas. Again, Rembrandt’s portraits are a perfect reference— he was a mastery of this drawing!
Practising for 10 minutes at a time can help you master the balance between control and looseness.
Short Strokes
Short strokes are individual, small lines that don’t overlap, creating subtle and gradual shading.
This technique is great for smooth textures, like skin or faces or soft fabrics.
I recommend practicing this technique by drawing flat boxes.
Use one box to create an even tone with short strokes, another by using a thicker pen to create a darker tone, and then experimenting with the remaining boxes to explore different variations.
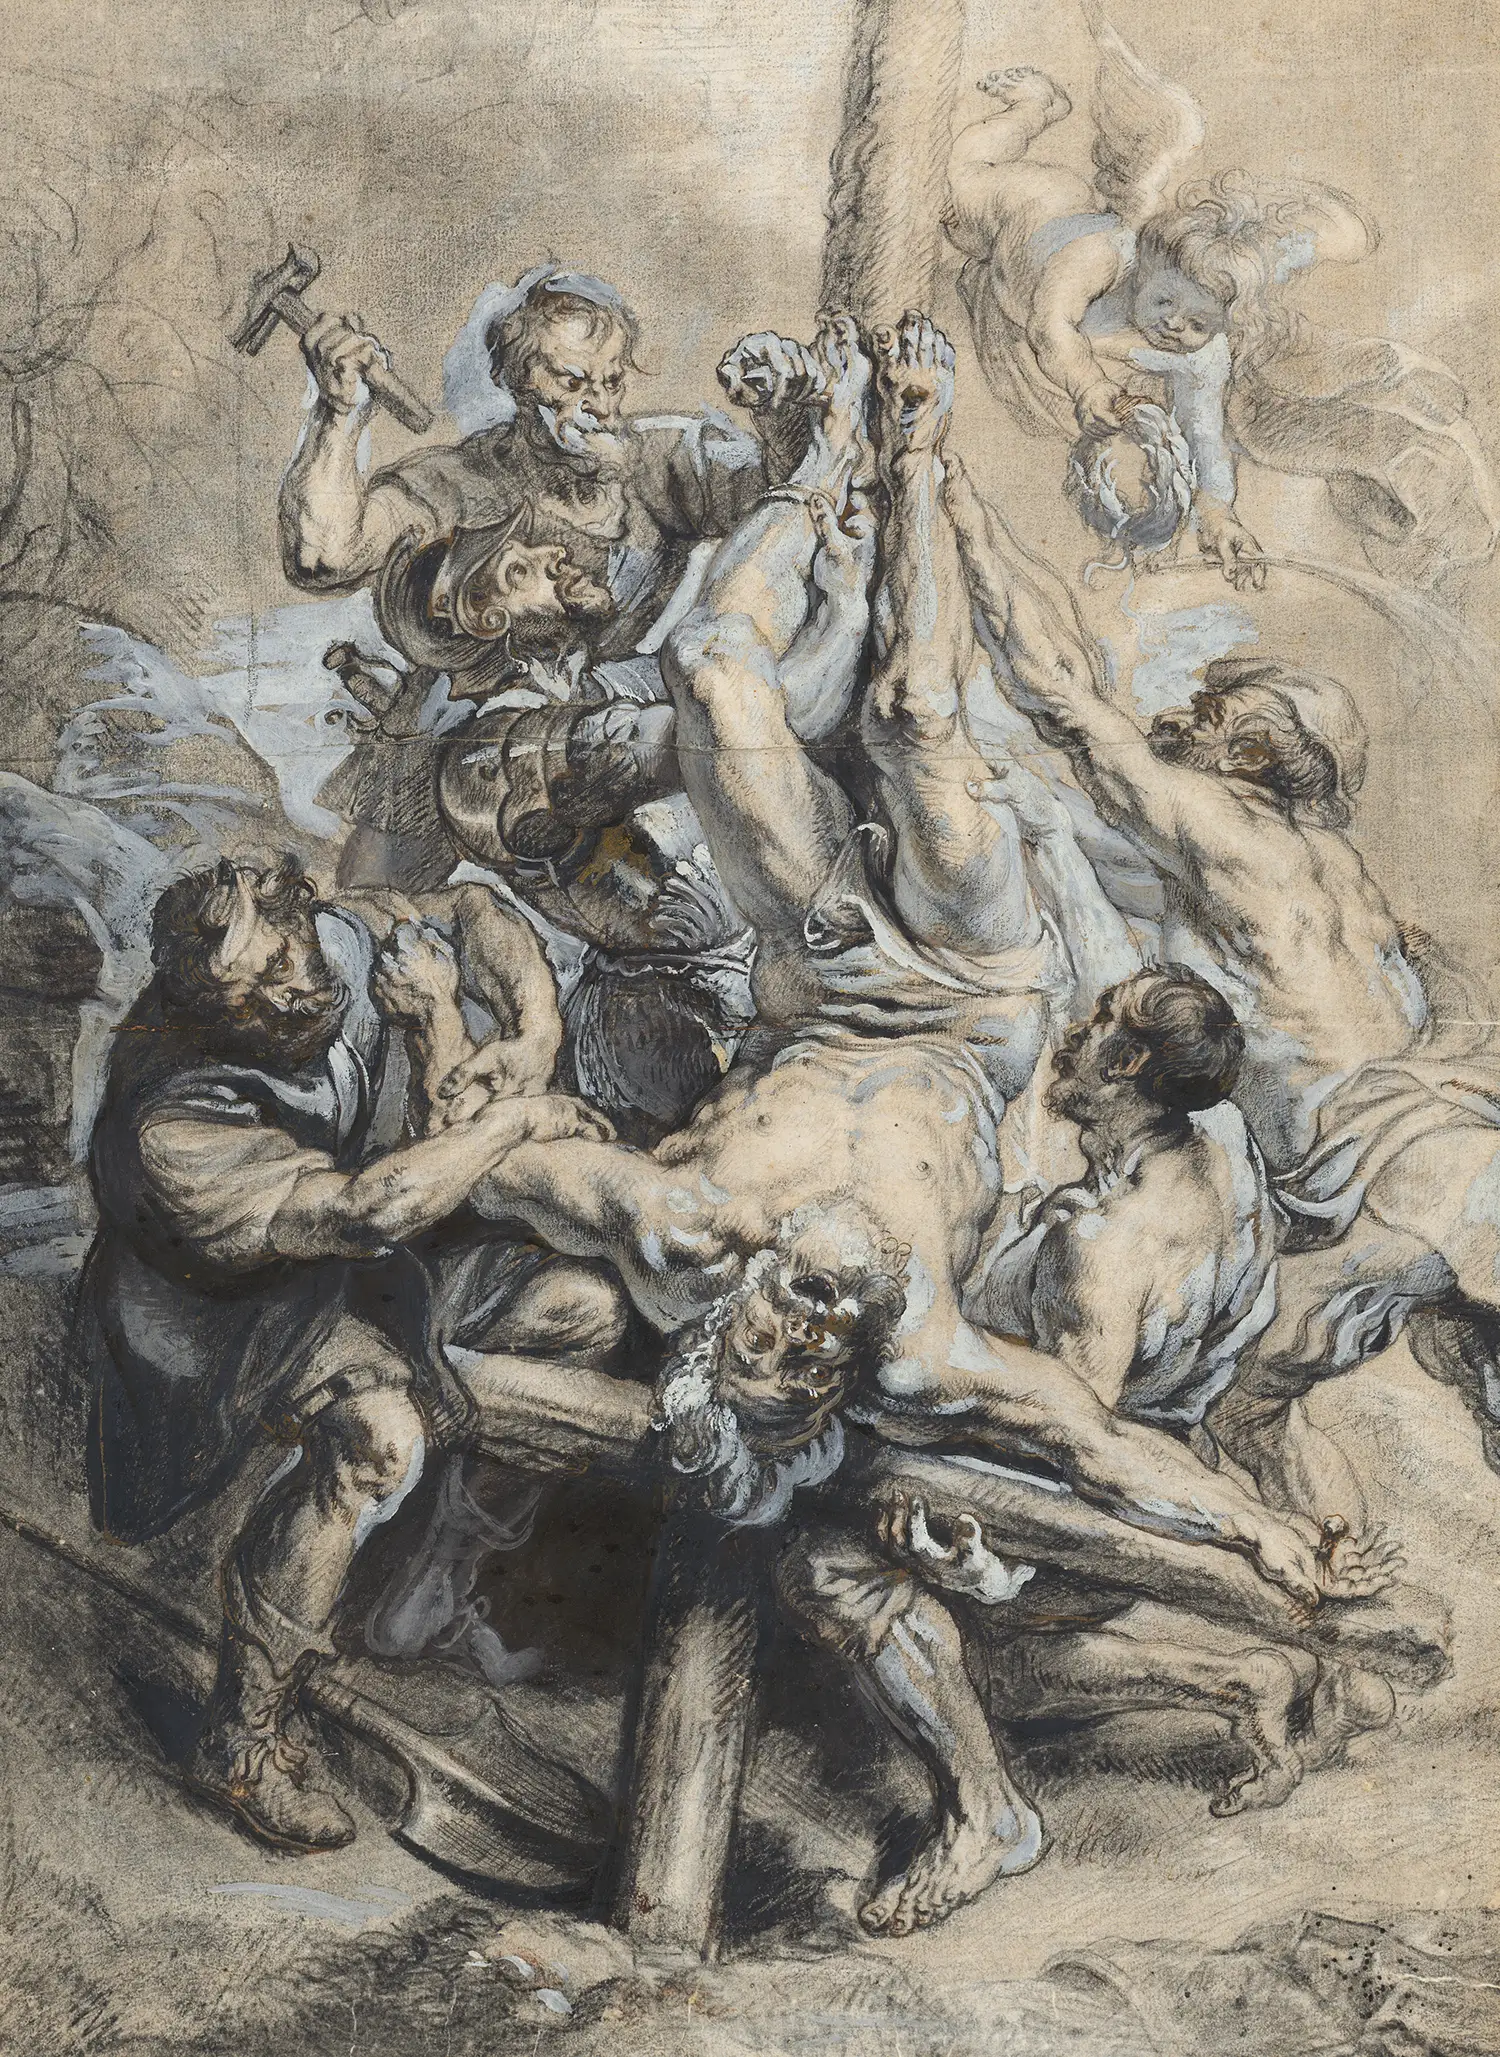
For inspiration, check out Peter Paul Rubens‘ master drawings.
Observe how he skillfully uses short strokes to build rich, layered tones in his work.
His human drawings are out of this world!
Spend 10–15 minutes refining your stroke length and direction.
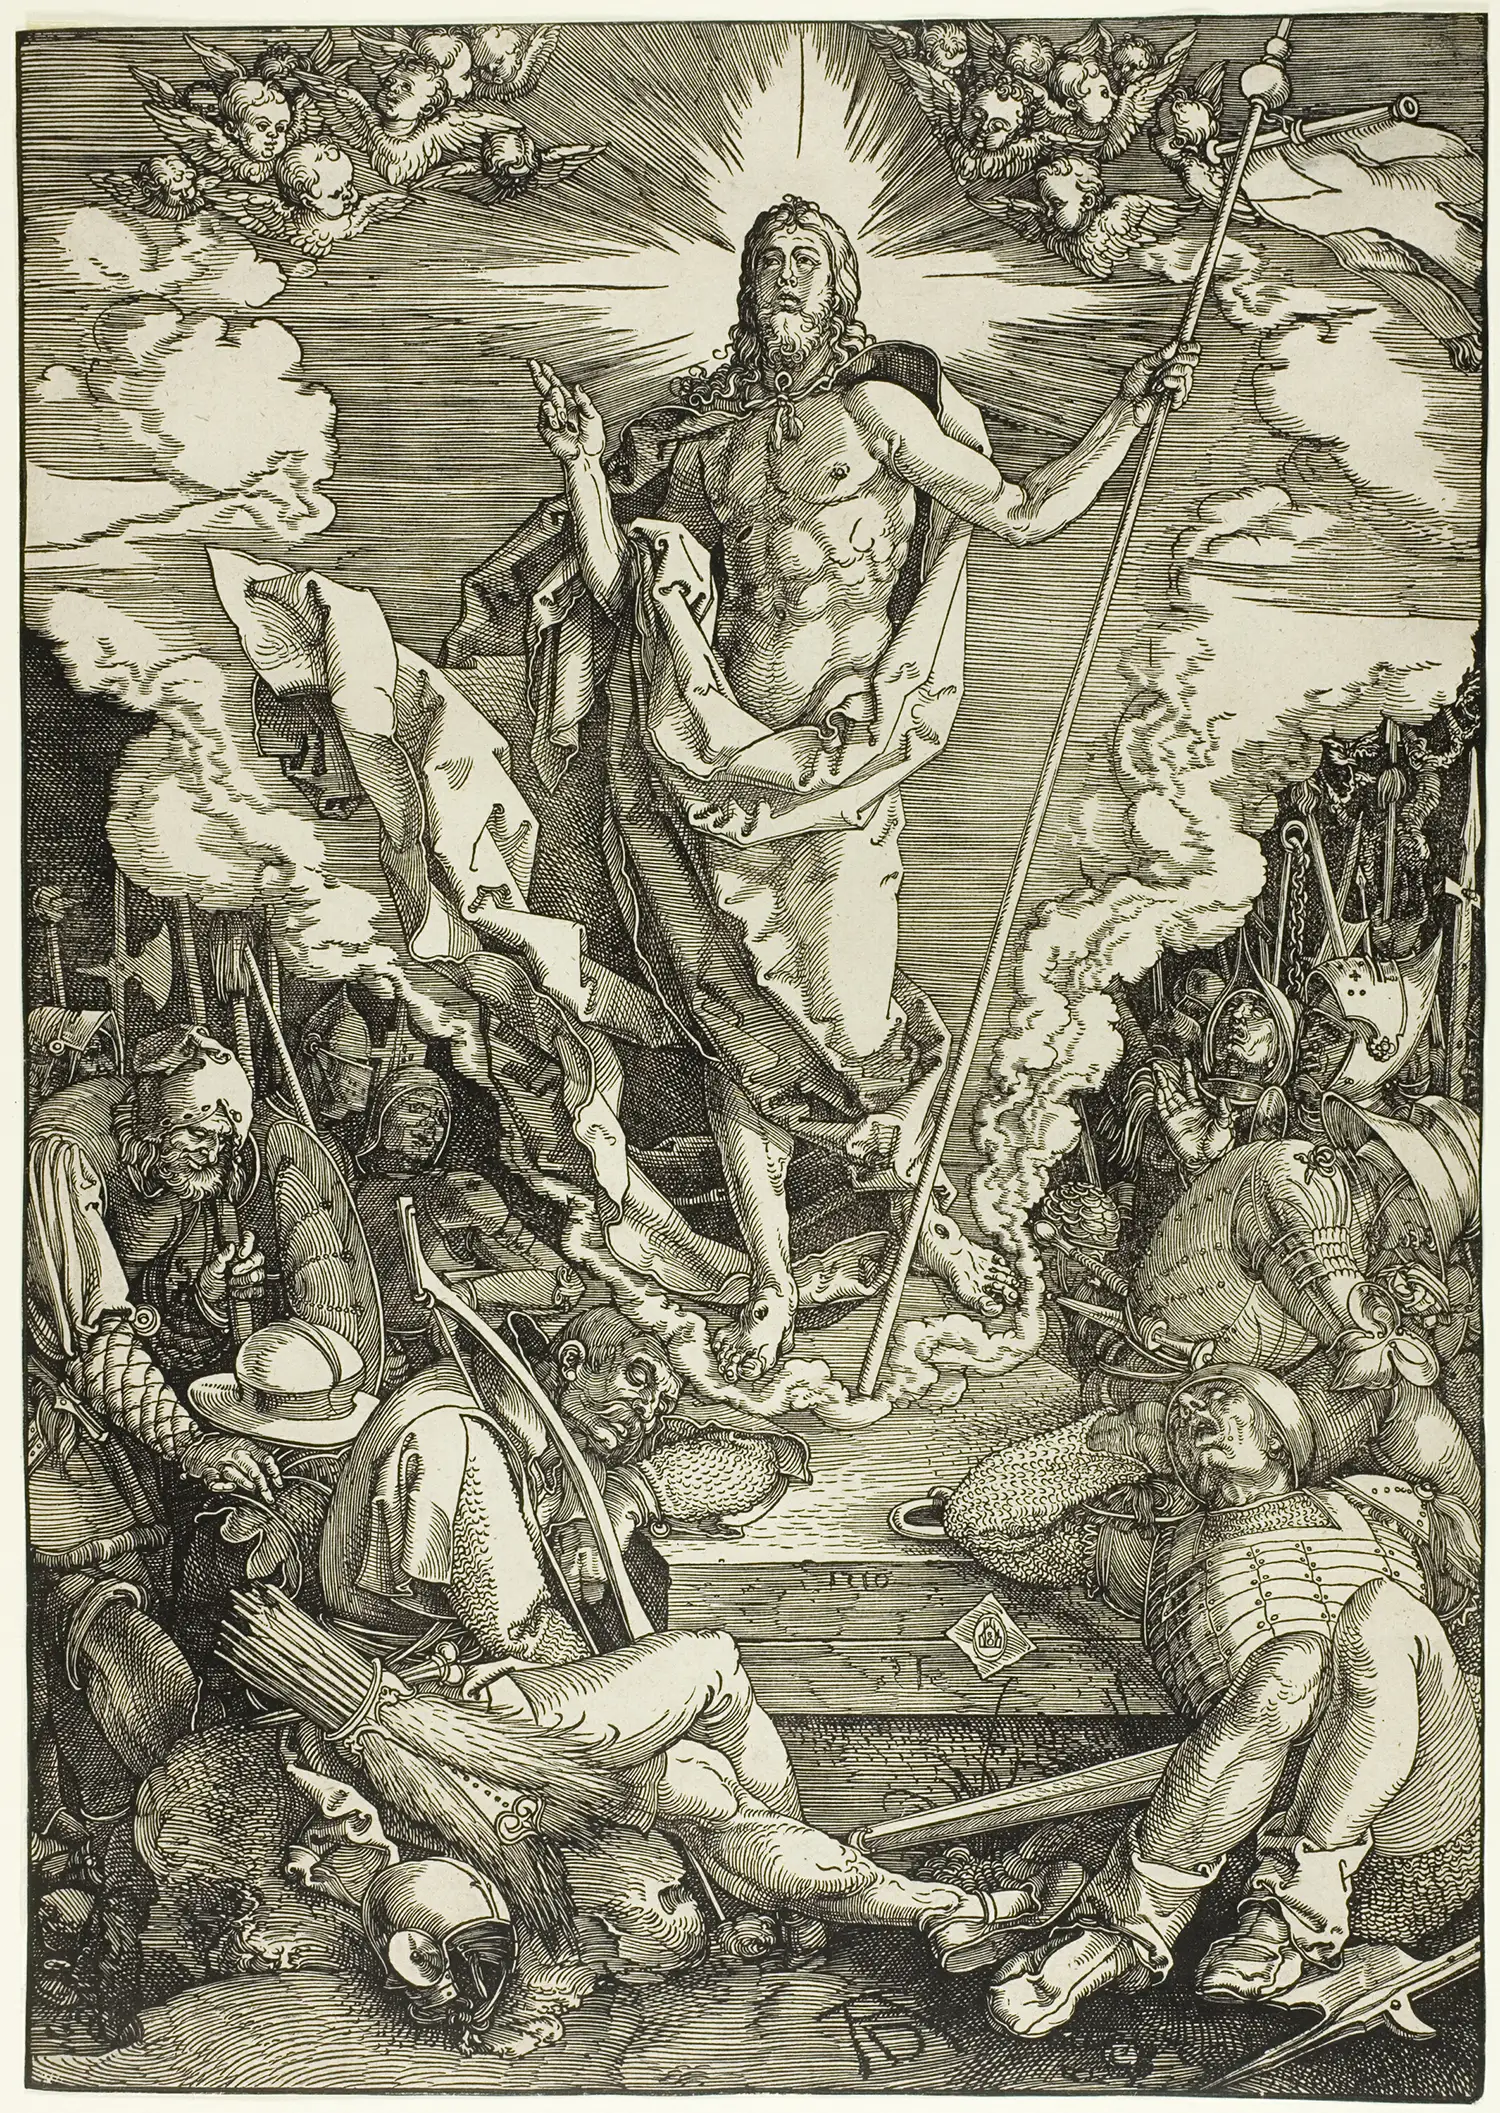
Contour Hatching
Contour hatching uses lines that follow the shape of an object to enhance its three-dimensional quality. It’s ideal for drawing curved objects like faces or cylinders. This is probably my favourite technique within this how to shade with a pen for beginners guide.
The more you can describe a form, the more realistic your drawings will be with the tools you’re using, which this technique certainly helps with!
I think Albert Durer is a master at this technique, who perfectly used contour lines to describe the form and volume of an object.
If you prefer to not shade in the conventional sense, this technique is for you.
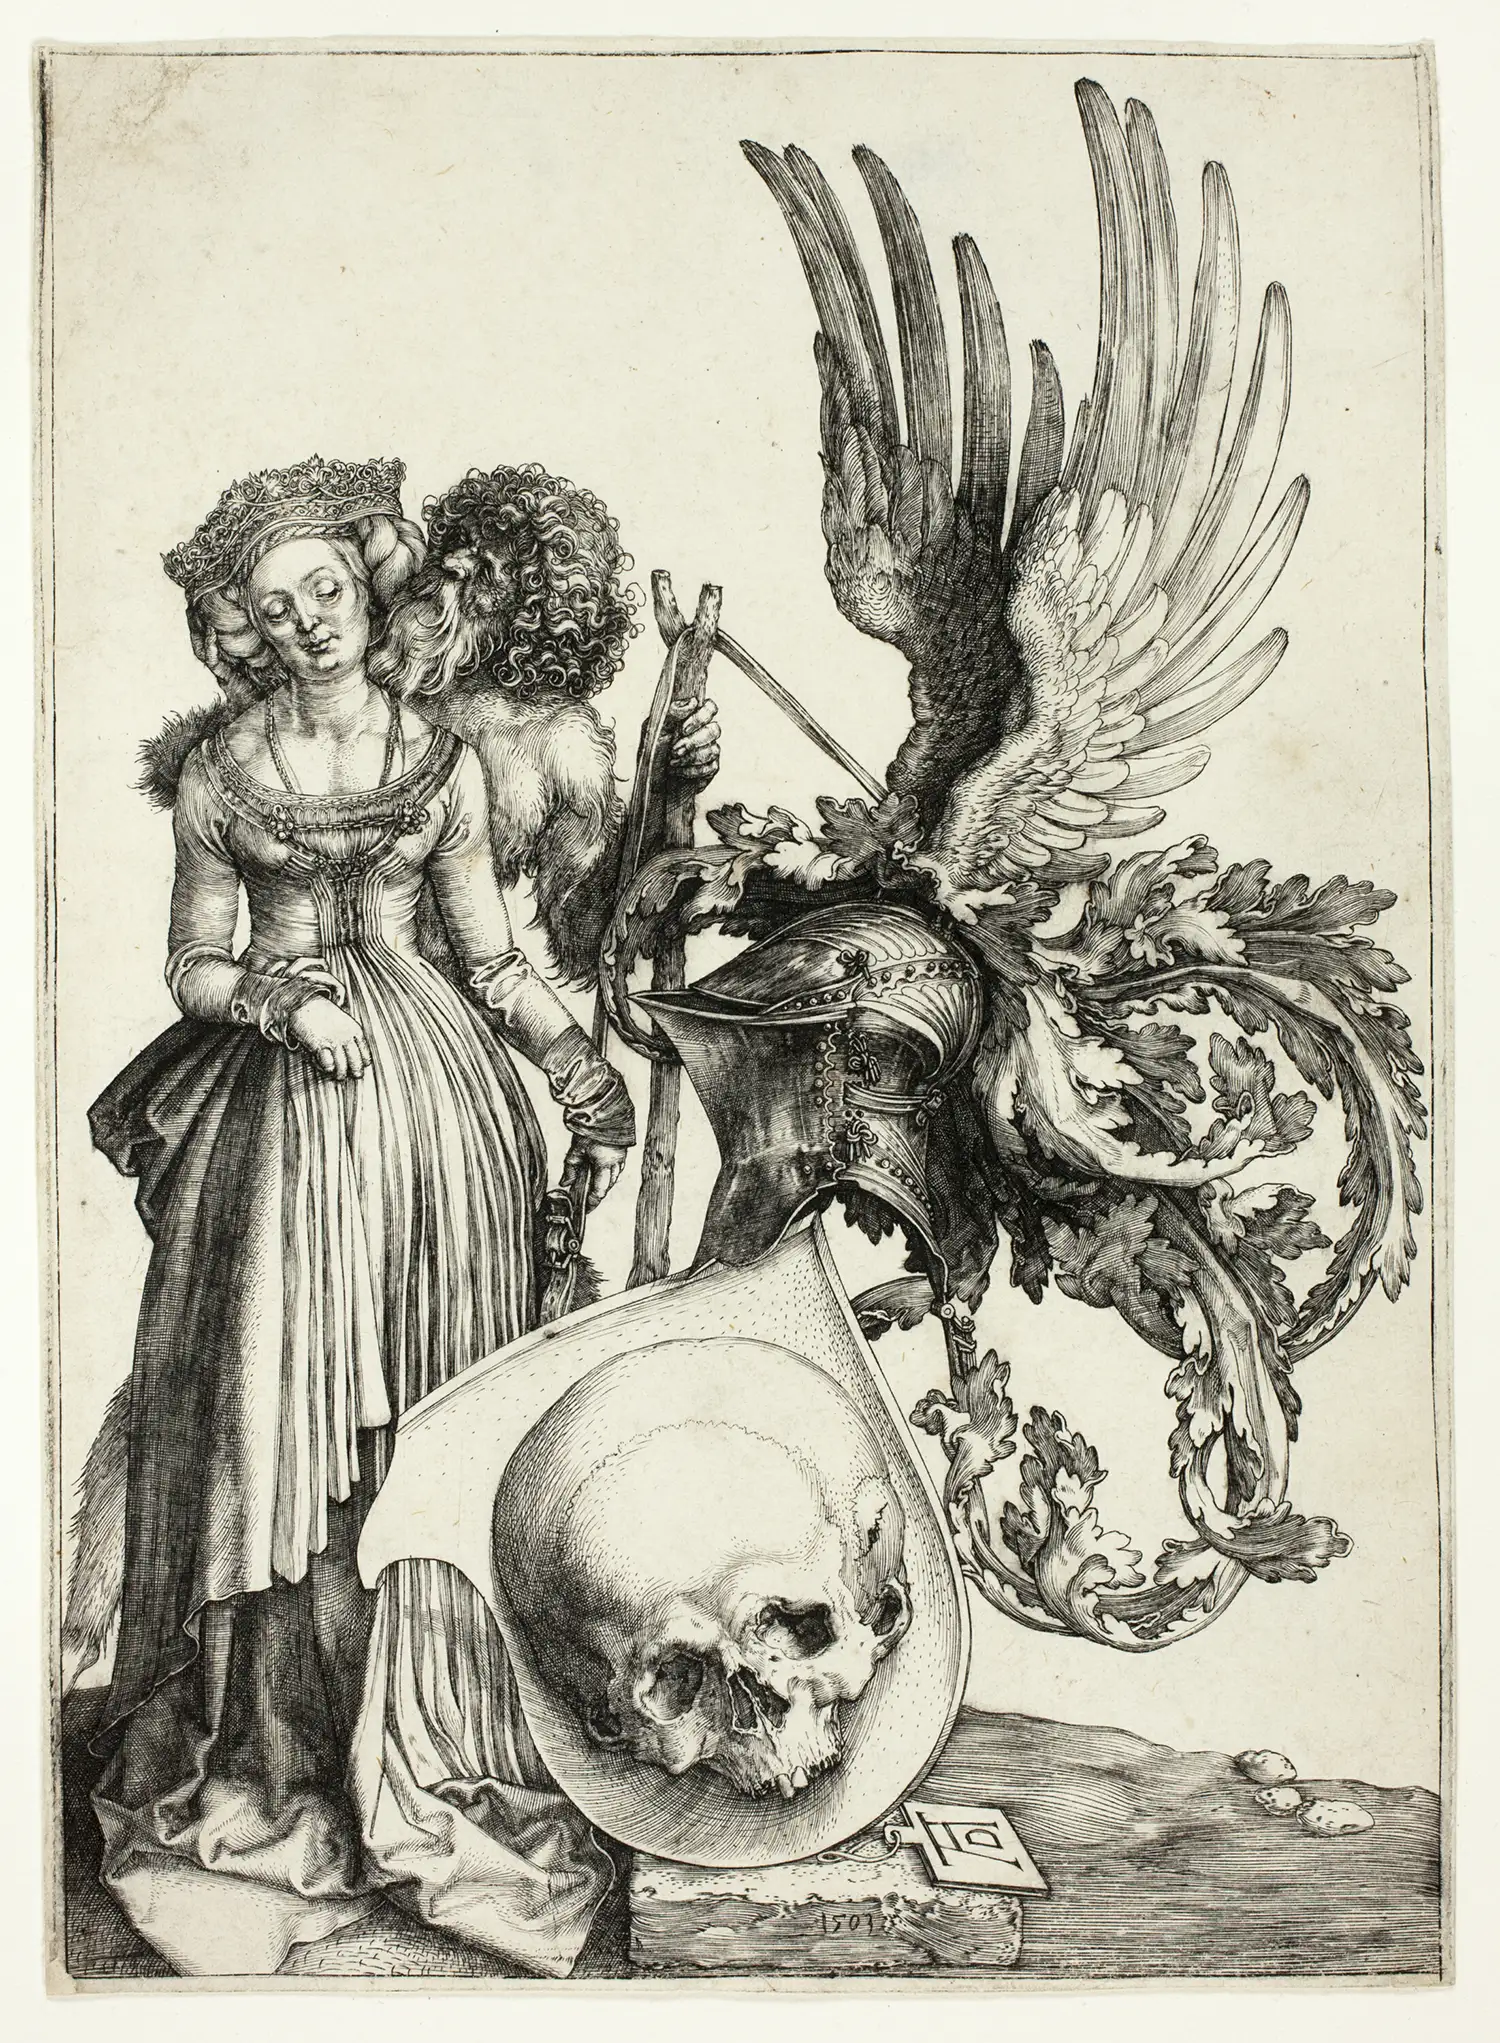
You can combine this technique with cross hatching, hatching your lines but going around the form.
One useful practice is to draw an organic shape and think of it as a 3D object. Follow the contour of the shape as much as possible, allowing your marks to wrap around the form.
Experiment with varying the pressure of your strokes, making them thicker, overlapping, or more sparse to create a range of tones.
The key is to always follow the form and enhance its three-dimensionality. For more guidance on this technique, check out this video.
Practice for 15 minutes, focusing on following the object’s contours.
Parallel Line Shading
This technique uses lines to produce a clean, modern aesthetic, making it ideal for minimalist designs or areas requiring smooth, consistent tones.
Experiment by varying line weight and spacing: create lighter tones with gentler pressure and wider spacing, and darker tones with heavier pressure and closer lines.
It’s a similar technique to that of stippling in many ways.
Gradually transition from light to dark across an area for a smooth gradient effect.
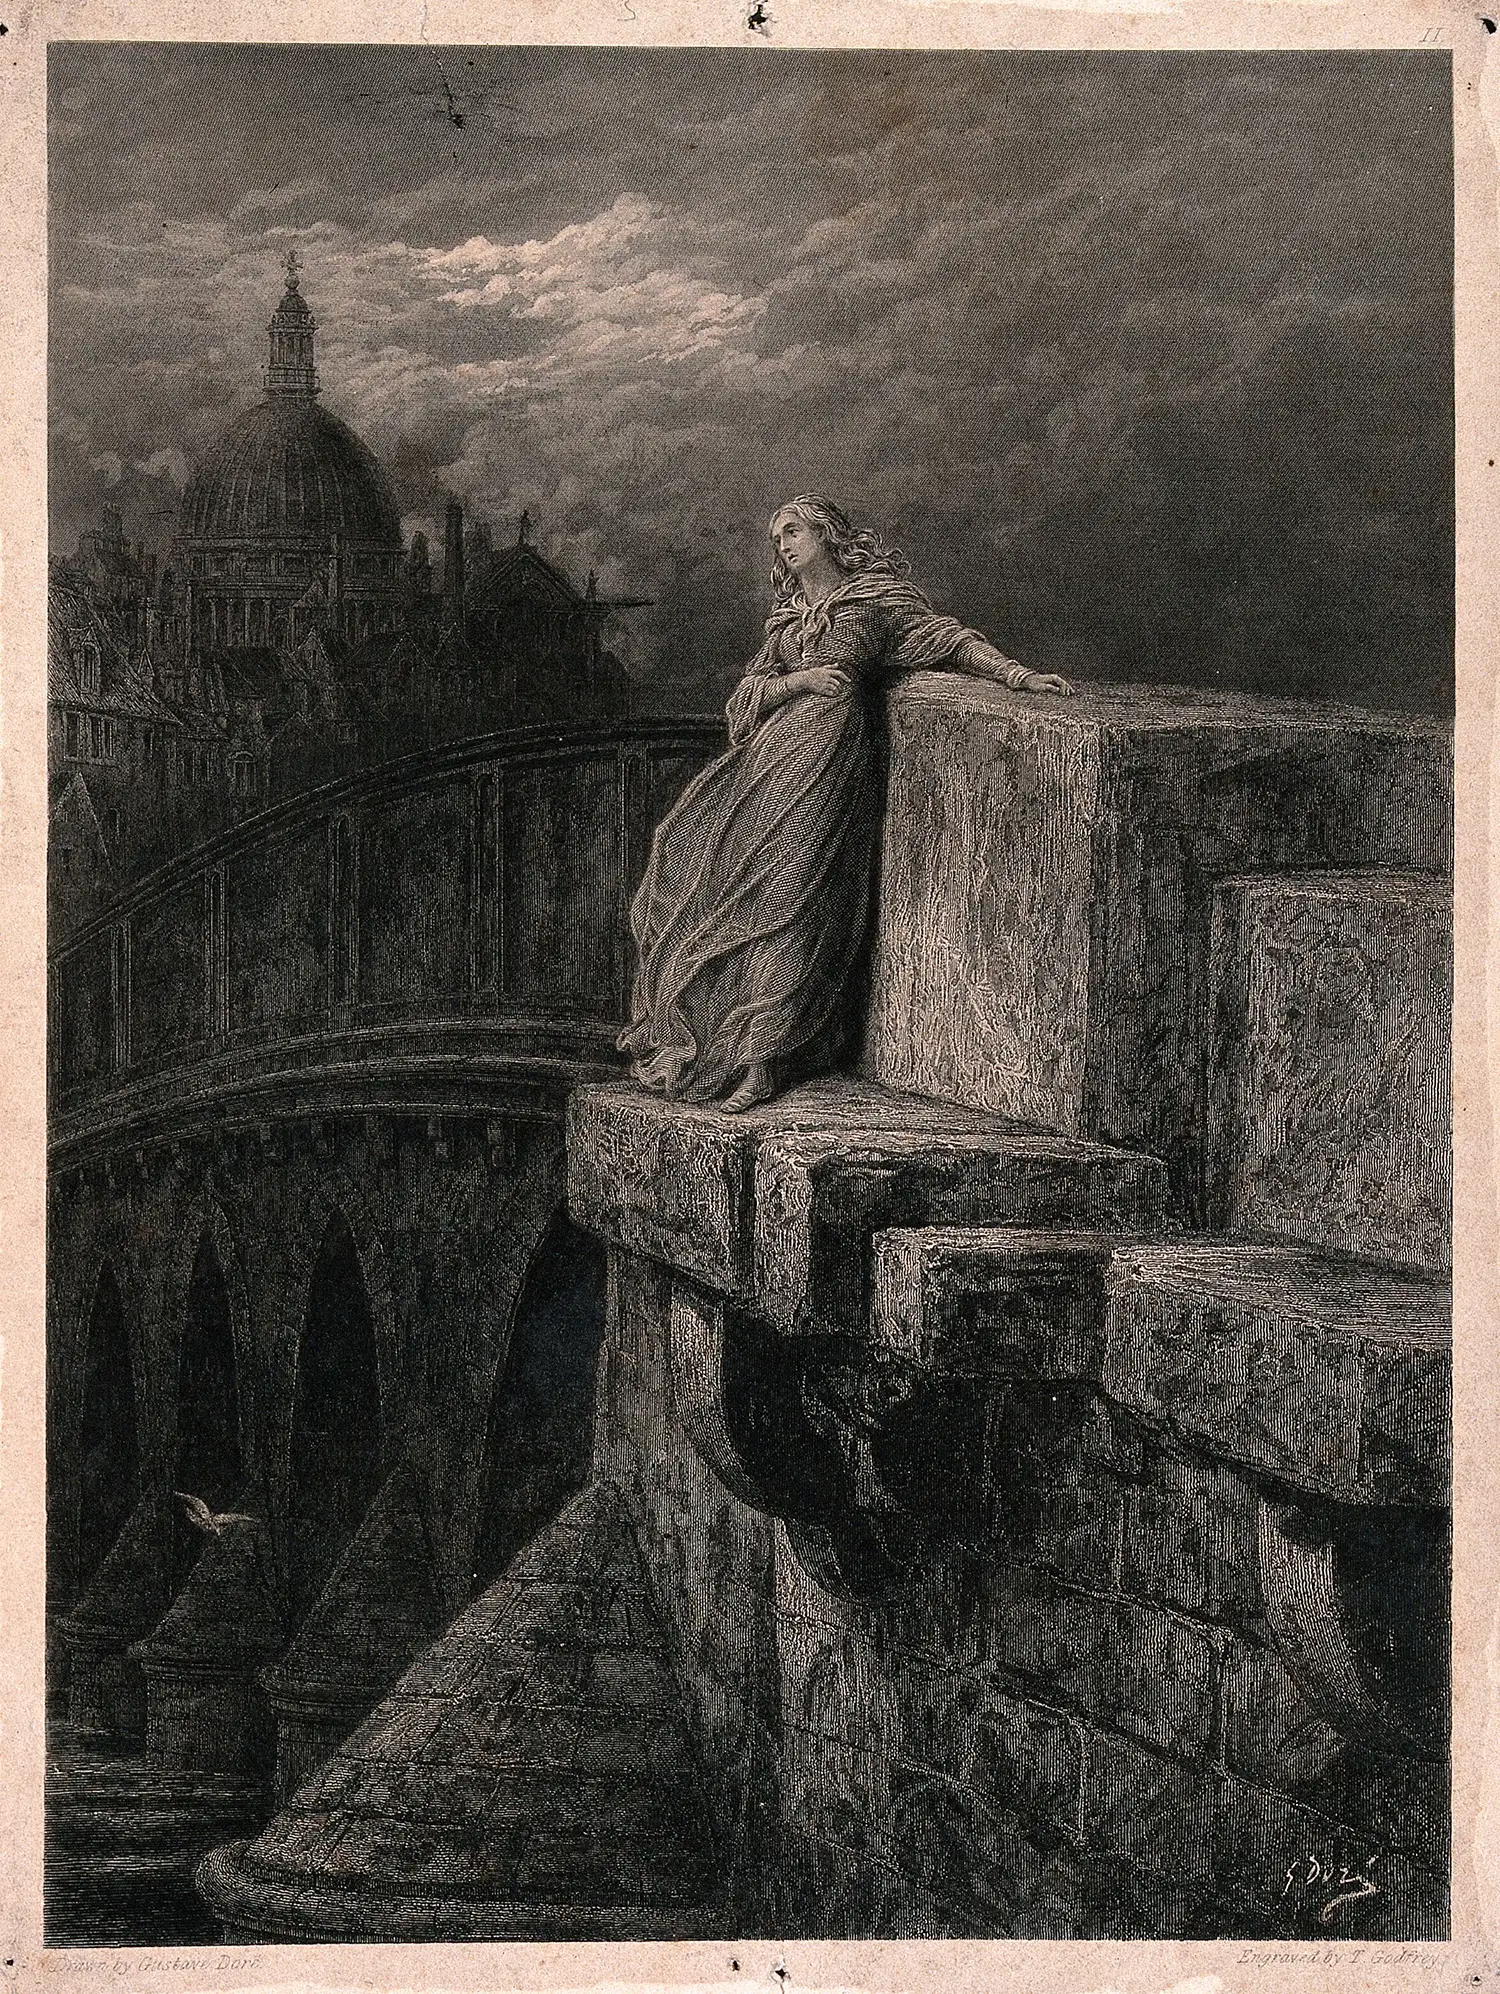
Explore Gustave Doré’s incredible work for inspiration – his mastery of detail and accuracy is remarkable!
Dedicate 10 minutes per session to practice controlling spacing, pressure, and direction for more precision and dynamic results.
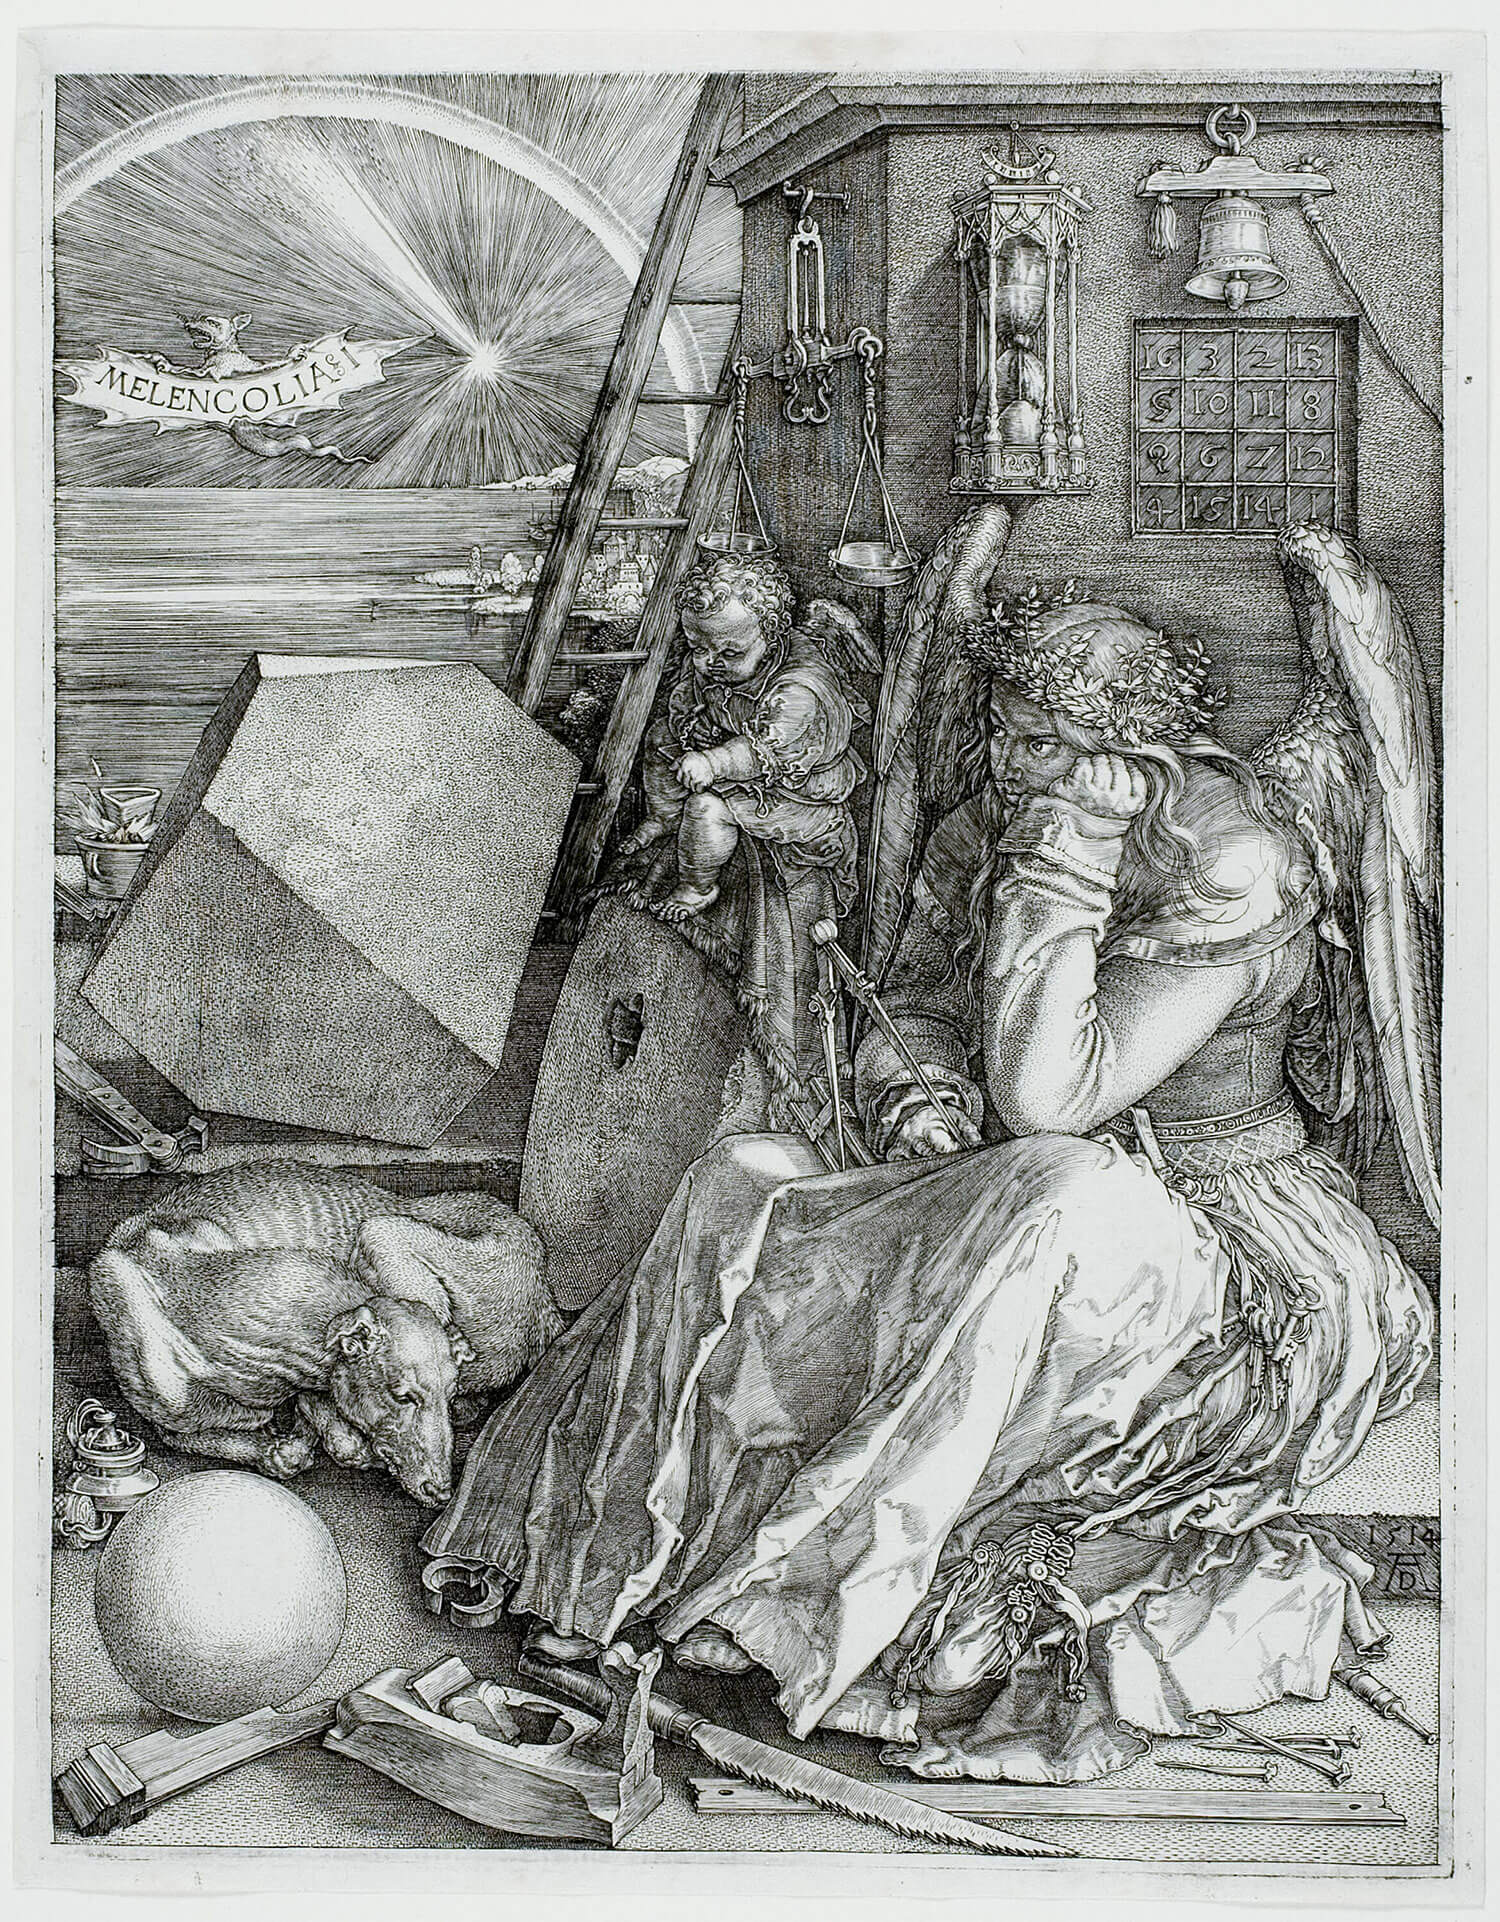
Gradient Hatching
Gradient hatching involves gradually increasing or decreasing line density for smooth transitions between light and dark. This technique works well for creating depth in shadows and highlights.
Think of a gradient like the ones you see in Adobe Photoshop.
Draw a rectangle about 10cm wide and 2cm tall. Divide it into five equal sections by lightly marking vertical lines.
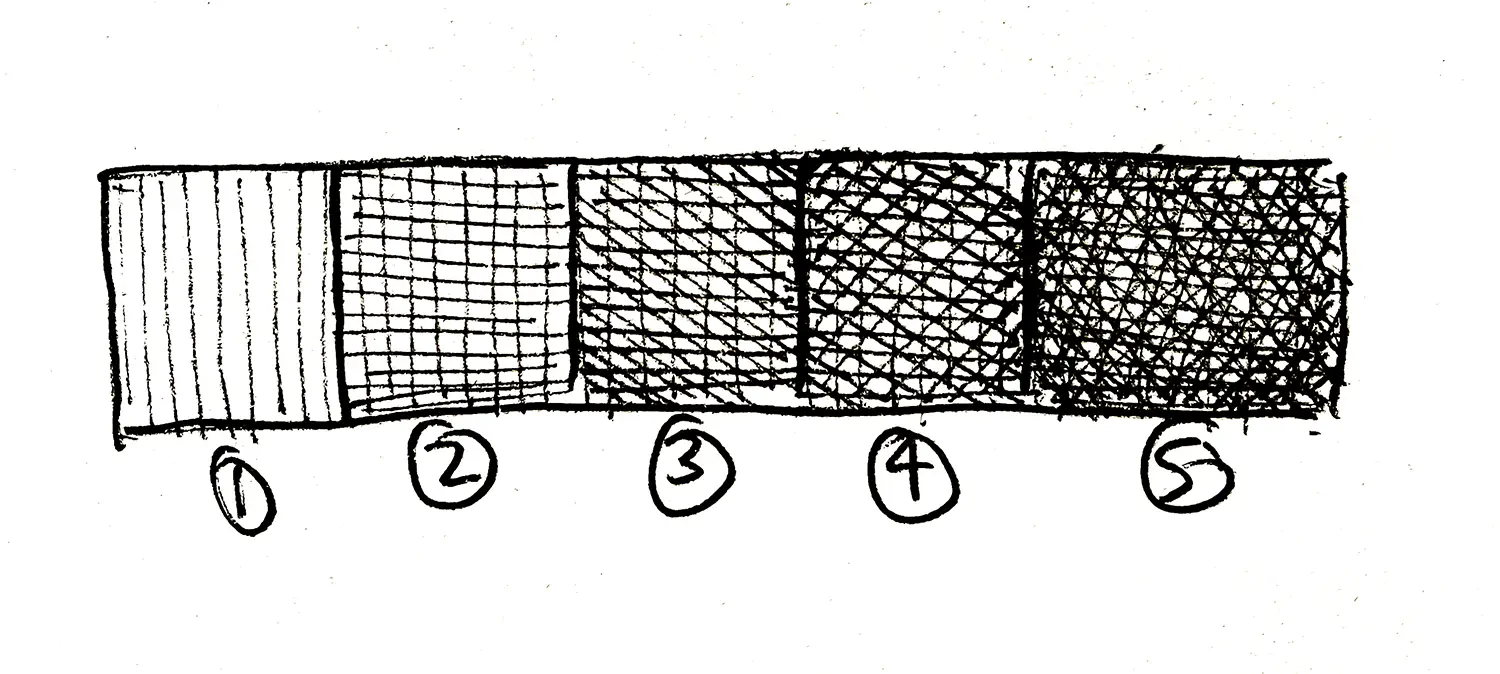
In the first box, use evenly spaced, very light hatching lines. Focus on maintaining consistent pressure and spacing.
Move to the next section and slightly increase the pressure and reduce the spacing between the lines.
Continue this process in each section, progressively adding more pressure and layering lines to make the tones darker.
Once all five sections are filled, return to the borders where the sections meet and lightly blend the tones by adding overlapping strokes, smoothing the transitions between light and dark areas.
Step back and assess if the transition appears smooth.
Adjust by adding or lightening strokes in areas where the gradient feels abrupt. Repeat this exercise with different hatching directions (horizontal, diagonal, or curved) to improve control and versatility.
Practice for 10–15 minutes per session to master consistency and smooth transitions.
Again look at the stunning work of Albrecht Durer. He uses this technique excellently in his work, amongst the other techniques shared in this video!
Circular Shading
Circular shading uses small, overlapping circular motions to create soft transitions and textures. It’s particularly effective for achieving smooth, gradual shading in areas like clouds, skin, and other organic forms.
By using controlled circular movements, you can avoid harsh lines and create a gentle, blended effect.
The technique helps add depth and realism to your drawings, making it ideal for capturing softer surfaces or rounded shapes.
Start by sketching a basic leaf outline on your paper. It can be any type of leaf, but for simplicity, a basic oval or teardrop shape works well.
Determine where your light source is coming from.
The Drawing Exercise
For this exercise, place it at the top-left corner of your paper, so the top-left of the leaf will have the most light.
Starting on the darker side of the leaf (the opposite side of the light source), use small, overlapping circular motions to add shading. Focus on building up smooth gradients without harsh lines.
As you move toward the lighter side of the leaf, reduce the pressure of your strokes to create a smooth transition between light and dark areas.
Keep the strokes light and fluid to maintain the softness of the shading.
Add the leaf veins by shading them darker or lighter than the surrounding area. You can either leave them blank for contrast or add subtle shading to enhance their appearance.
Add some extra shading to any folds or curves of the leaf to give it a more three-dimensional look. Ensure the transition from light to shadow is as smooth as possible.

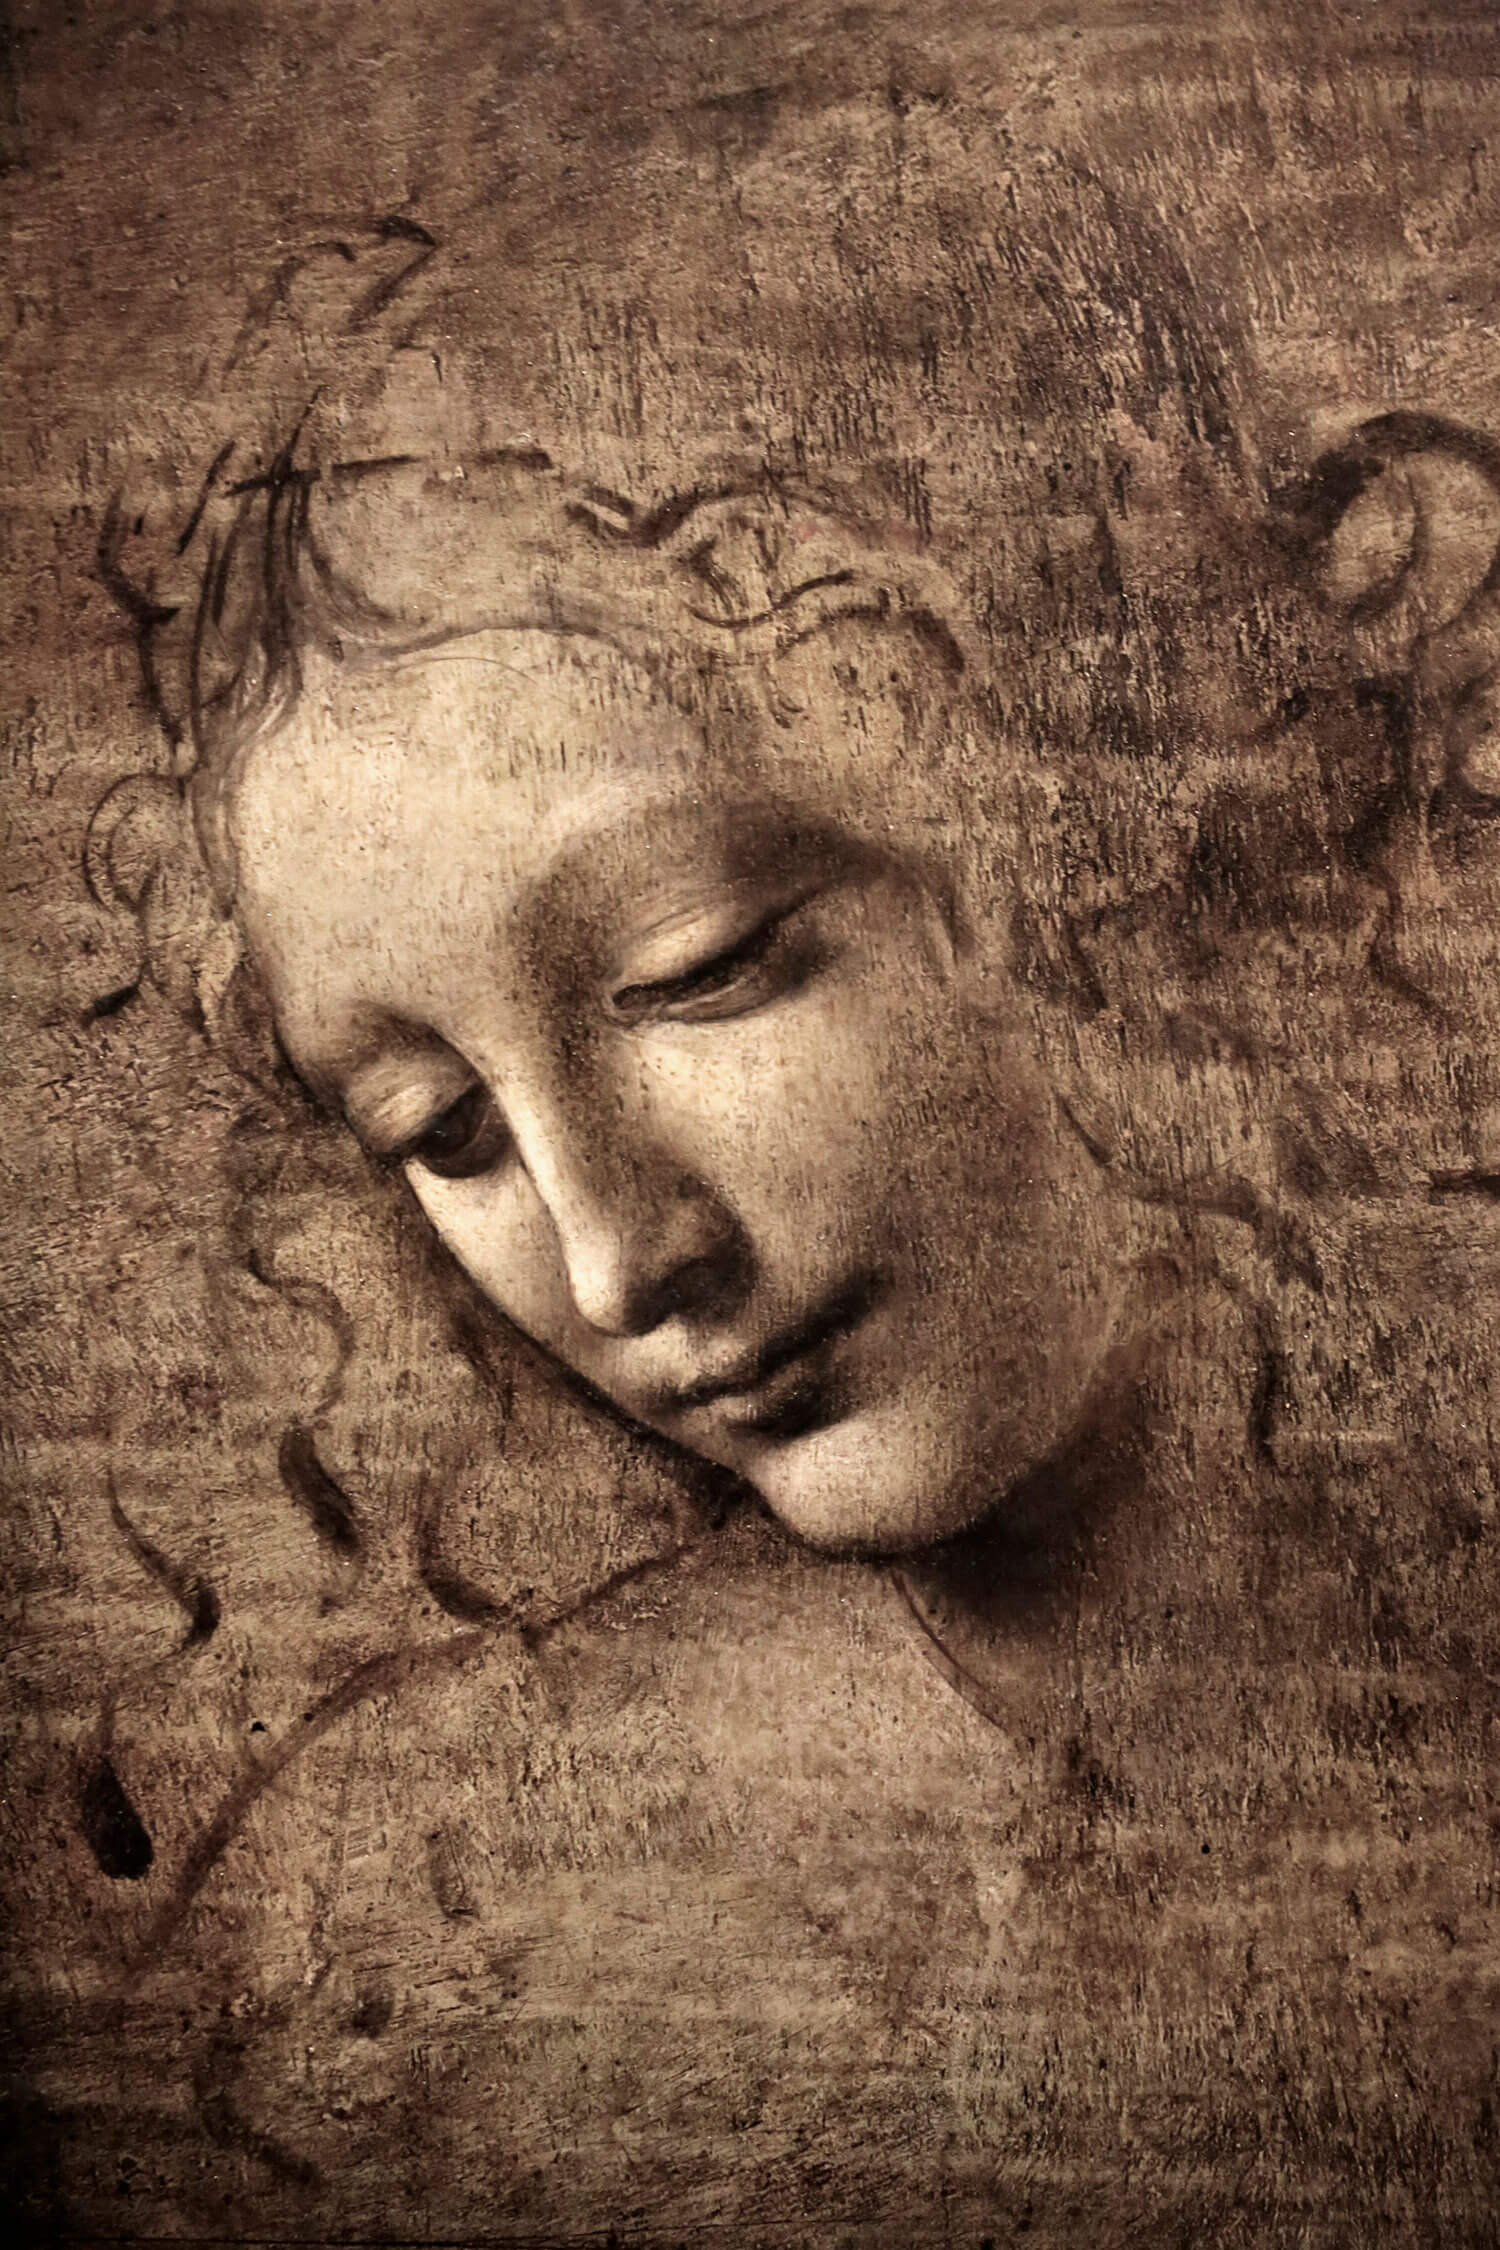
An artist renowned for using circular shading in his sketches is Leonardo da Vinci.
His studies of anatomy, faces, and natural textures showcase how he masterfully used circular shading to create subtle transitions in light and shadow, adding volume and dimension to his subjects.
He is a true legend in the world of art and I recommend you commit to master studies of his work!
To improve your control and flow, practice this technique for 10 minutes, focusing on making smooth, consistent circular motions.
Feathering
Feathering uses light, tapered strokes to create smooth transitions between tones, ideal for blending or softening edges.
Start by pressing semi-hard at the beginning of a stroke, then gradually ease the pressure as the line tapers off.
Experiment with variations, such as transitioning from light to hard pressure or alternating between light and hard strokes to create dynamic effects.

A master of this technique is Norman Rockwell. In his illustrations, he often used feathering to blend skin tones and fabrics seamlessly, adding depth and realism to his portraits.
This method is particularly effective for shading delicate features like hair or soft transitions in other areas. To practice, dedicate a sketchbook page to exploring different feathering marks.
Try clustering strokes for darker tones or spacing them out for lighter shading.
Spend 10 minutes focusing on stroke consistency and pressure control to refine your technique.
Pro Tips To Keep In Mind
- Maintain consistency by sticking to a single shading technique per drawing. Mixing multiple methods can make the artwork appear cluttered and confuse the viewer.
- Experiment with pen pressure to add variety to your shading techniques.
- Start with small practice drawings in your sketchbook.
- Use high-quality pens with consistent ink flow for better results.
- Practice these techniques consistently until you feel confident incorporating them into your final artworks.
Incorporating pen shading techniques like cross-contour, stippling, and cross-hatching into your artistic practice can significantly enhance your ability to create depth, texture, and realism.
Each technique brings unique strengths to the table, whether it’s the fluid dimensionality of cross-contour, the intricate detail of stippling, or the bold contrast of cross-hatching.
By dedicating time to consistent practice, you’ll refine your control, improve tonal accuracy, and develop a deeper understanding of how to represent form effectively.
These skills will not only elevate your pen drawings but also translate into other mediums, enriching your overall artistic journey.
Experiment with these methods, adapt them to your style, and watch your artwork evolve!
Whether you’re a beginner or an experienced artist, I hope you enjoyed this article all about how to shade with a pen for beginners!
Many thanks for listening and visiting my blog today. You can follow what I’m up to on my Twitter, Facebook, or Instagram pages, I’ll really appreciate it if you do, and don’t be afraid to say hi to me! Many thanks again, and have a great day!
 3rd December 2024
