Want some daily drawing exercises to vastly improve your skills?
If you don’t understand 3D structure, your drawings will always feel flat. No matter how much you practice…
In today’s article, I’m showing you how to make your drawings feel solid and believable using five drawing exercises that you can do daily.
They build on each other, and the final one is where it all clicks. So, stick around for that daily drawing exercises towards the end of this article. Let’s dive in.
Tapered lines and connect the dots.
This is about control, confidence, and flow – not perfect lines.
Use a HB or slightly softer pencil like a 2B. Use a variety of different pencil grips, drawing with your whole arm, not just your fingers.
Before you draw a line, ghost it a few times in the air before committing.
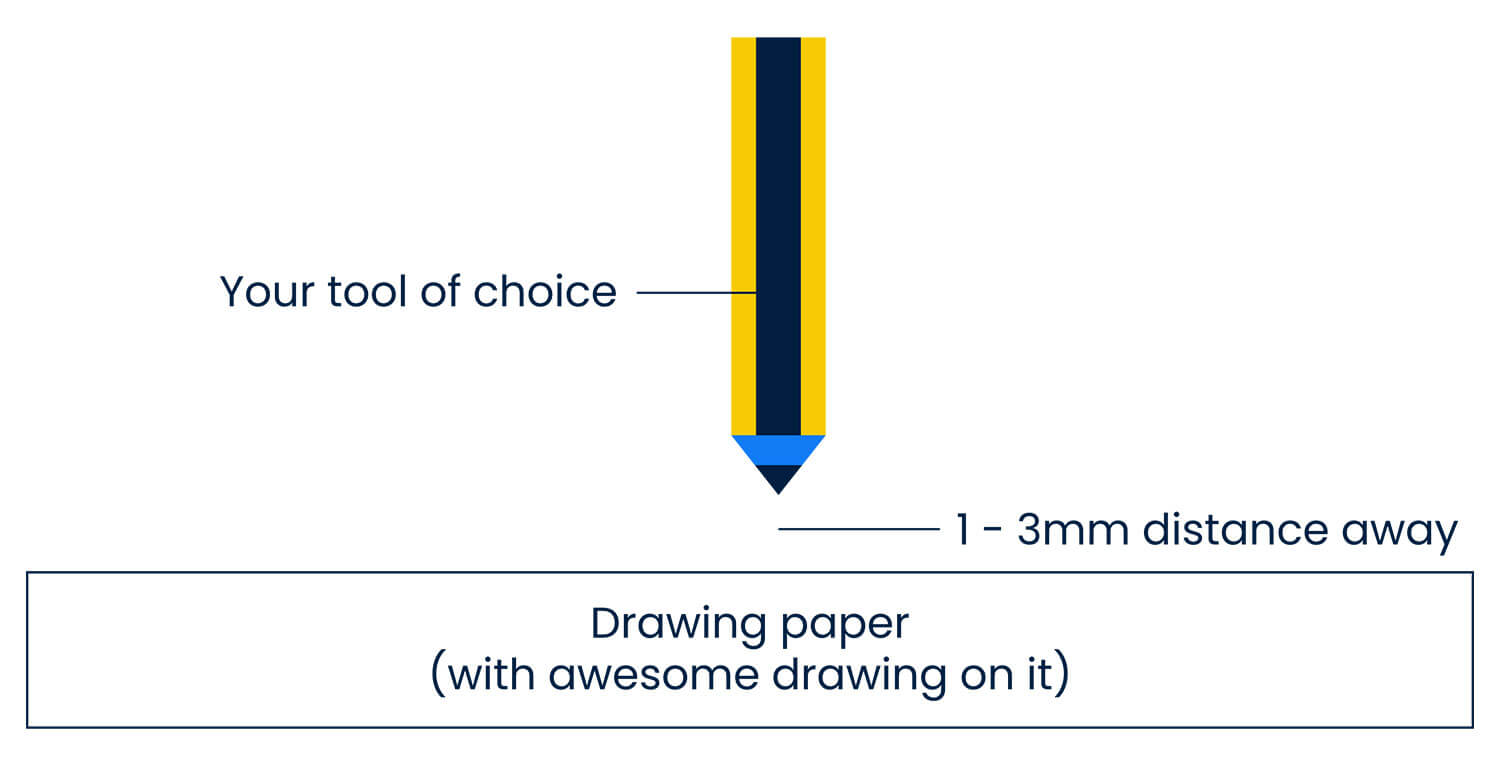
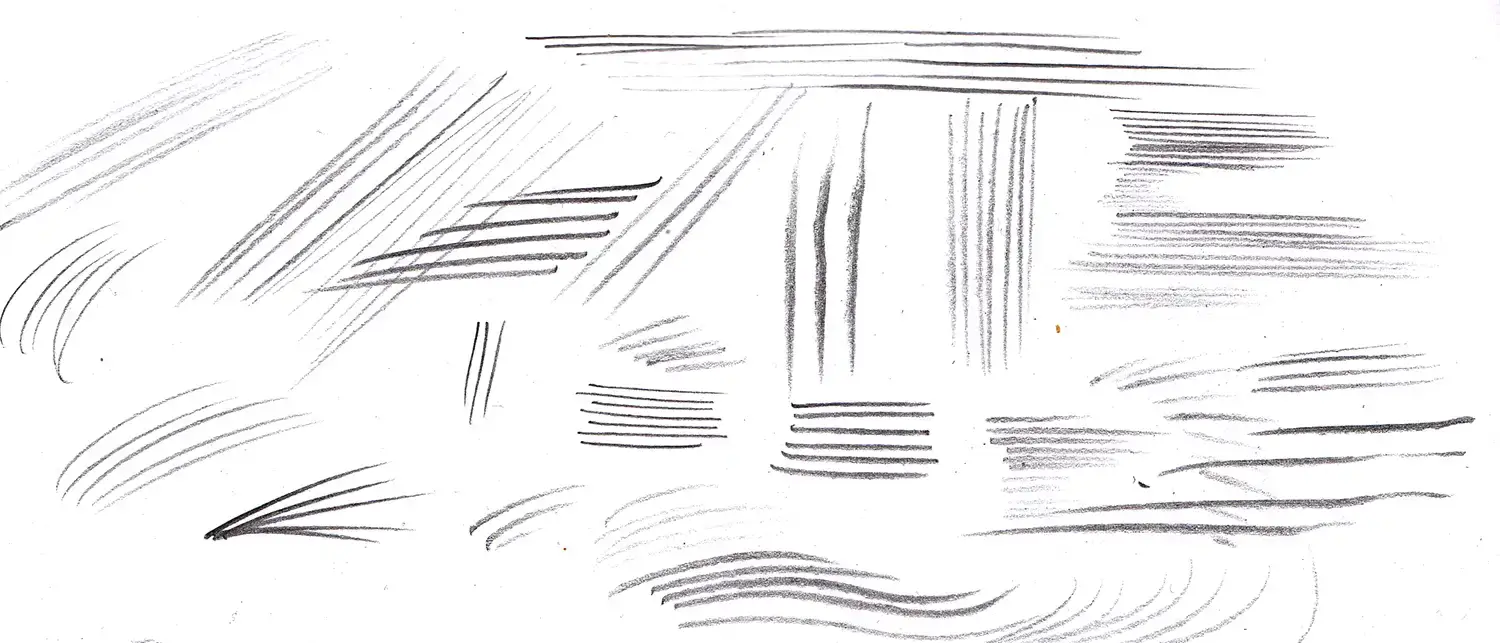
This is called ghosting. Now place a few dots and draw a tapered curve and connect them with one confident stroke.
Vary your drawing line quality and pressure. Start light, press slightly harder through the middle, then lift off again. Practice straight lines, shallow curves, and longer sweeping arcs.
If a line misses, don’t correct it, just move on.
Slightly wrong, but confident lines always looks better than hesitant and scratchy lines.

This exercise trains your hand, but more importantly, it entrains decision making as well.
If you feel like your drawings lack a sense of 3D or realism, don’t worry because this next exercise is where your drawings can really improve.
Cross contour box lines.
Draw a simple box.
Now add cross contour lines that follow the surfaces of the box.
The top plane gets horizontal lines. The side planes gets vertical or angled lines depending on how the box is turned in space.
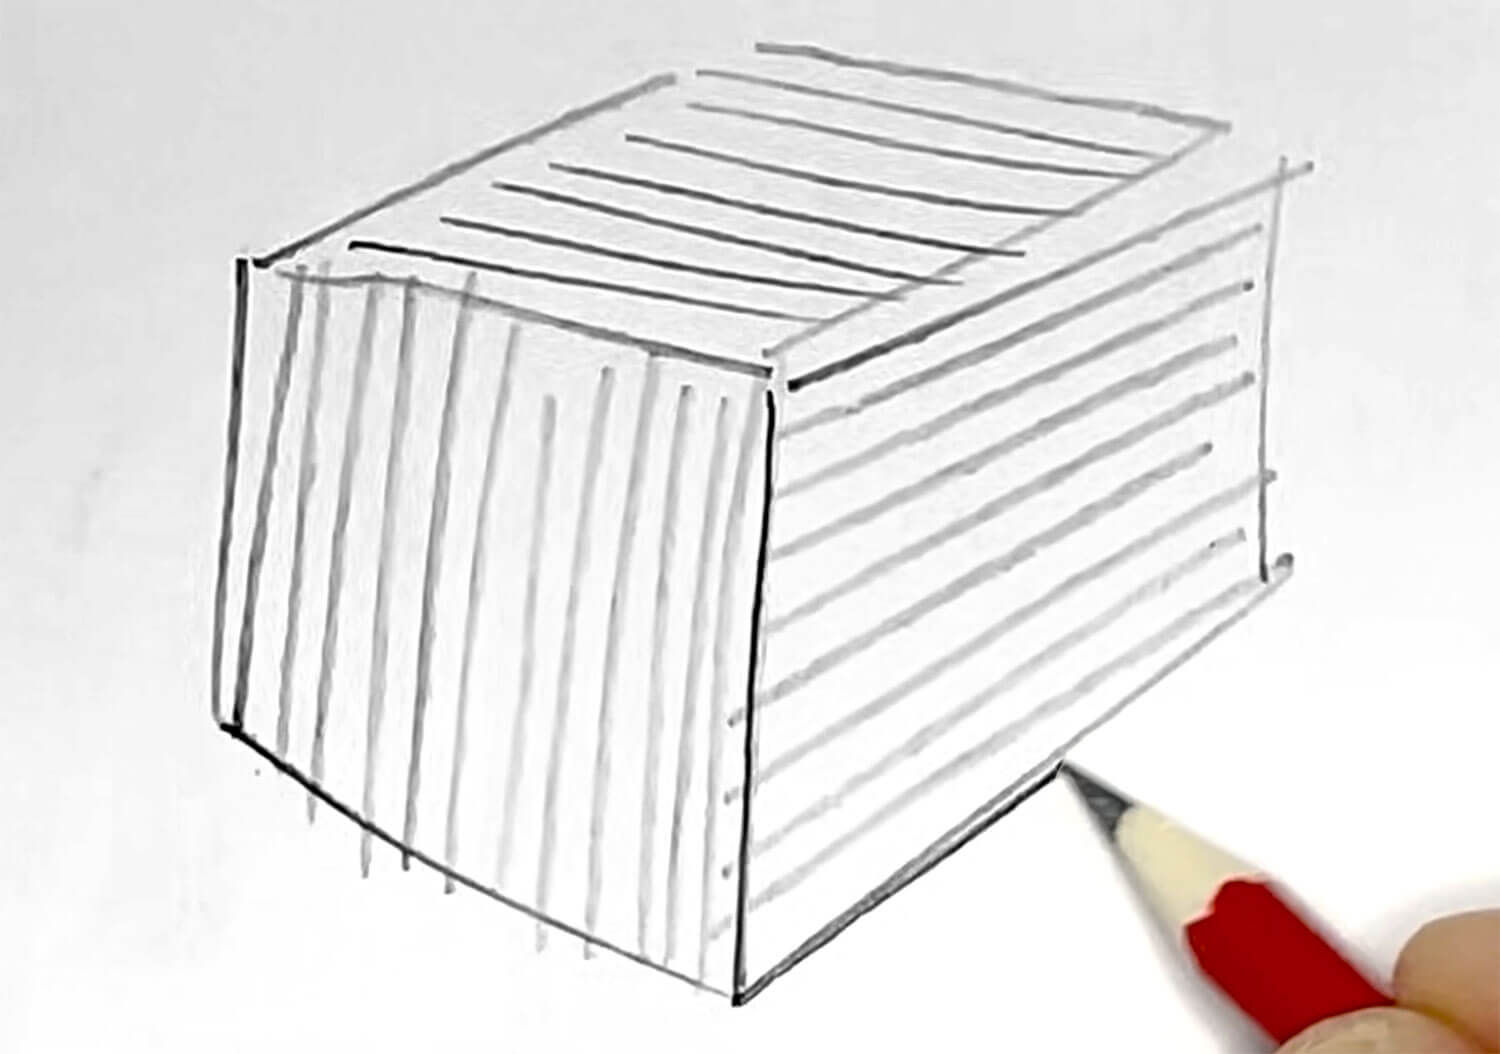
These lines should wrap around the box.
They tell the viewer how the box sits in relation to perspective.
A common mistake here is drawing diagonal lines across all of the planes.
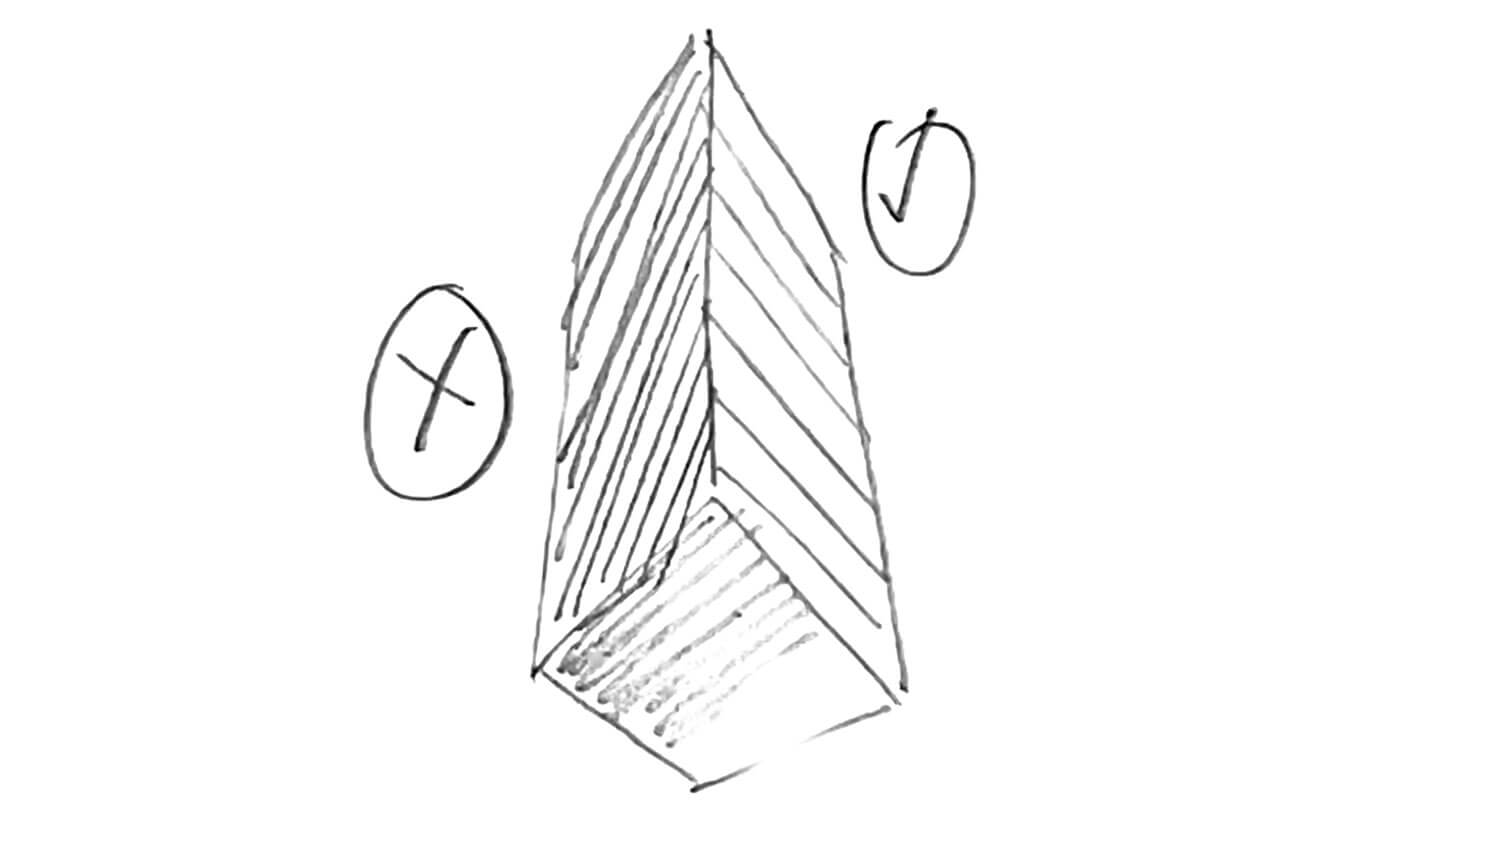
That flattens the box. If lines don’t follow the plane, they won’t describe the form.
You can lightly shade one side to reinforce the depth, and use tapering again.
Thicker lines on planes closer to the viewer. Thinner lines as surfaces that turn away to give the illusaion of depth and distance in your drawings.
This is a one easy trick to make your drawings feel alive by creating a sense of depth that makes your artworks pop.
Drop me a comment below with how your boxes turned out.
Hope you’re enjoying these daily drawing exercises – the next exercise can radically improve your drawing skill the most.
Organic shape form lines
Boxes are rigid, so now let’s make things feel alive.
Draw a few simple organic shapes. Sausage like forms or soft blobs.
Think of them pointing in different directions. Now wrap cross contour lines around them.

Use ellipses that change as the form turns.
Full ellipses when the form faces towards you. Flatter ones as it turns away. You don’t need to use only ellipses.
This is one of those drawing drills that improved my drawing skill the most.
You can also draw one single contour line running horizontally or vertically across the form as long as they follow the surface.

Make sure your lines which are on the outside of the shape are thicker than the ones that are underneath.
You can describe the lines underneath with a dotted line. Imagine you’re wrapping a ribbon around the shape. The line should curve, compress, and expand based on perspective.
This trains you to think in volume, not outlines.
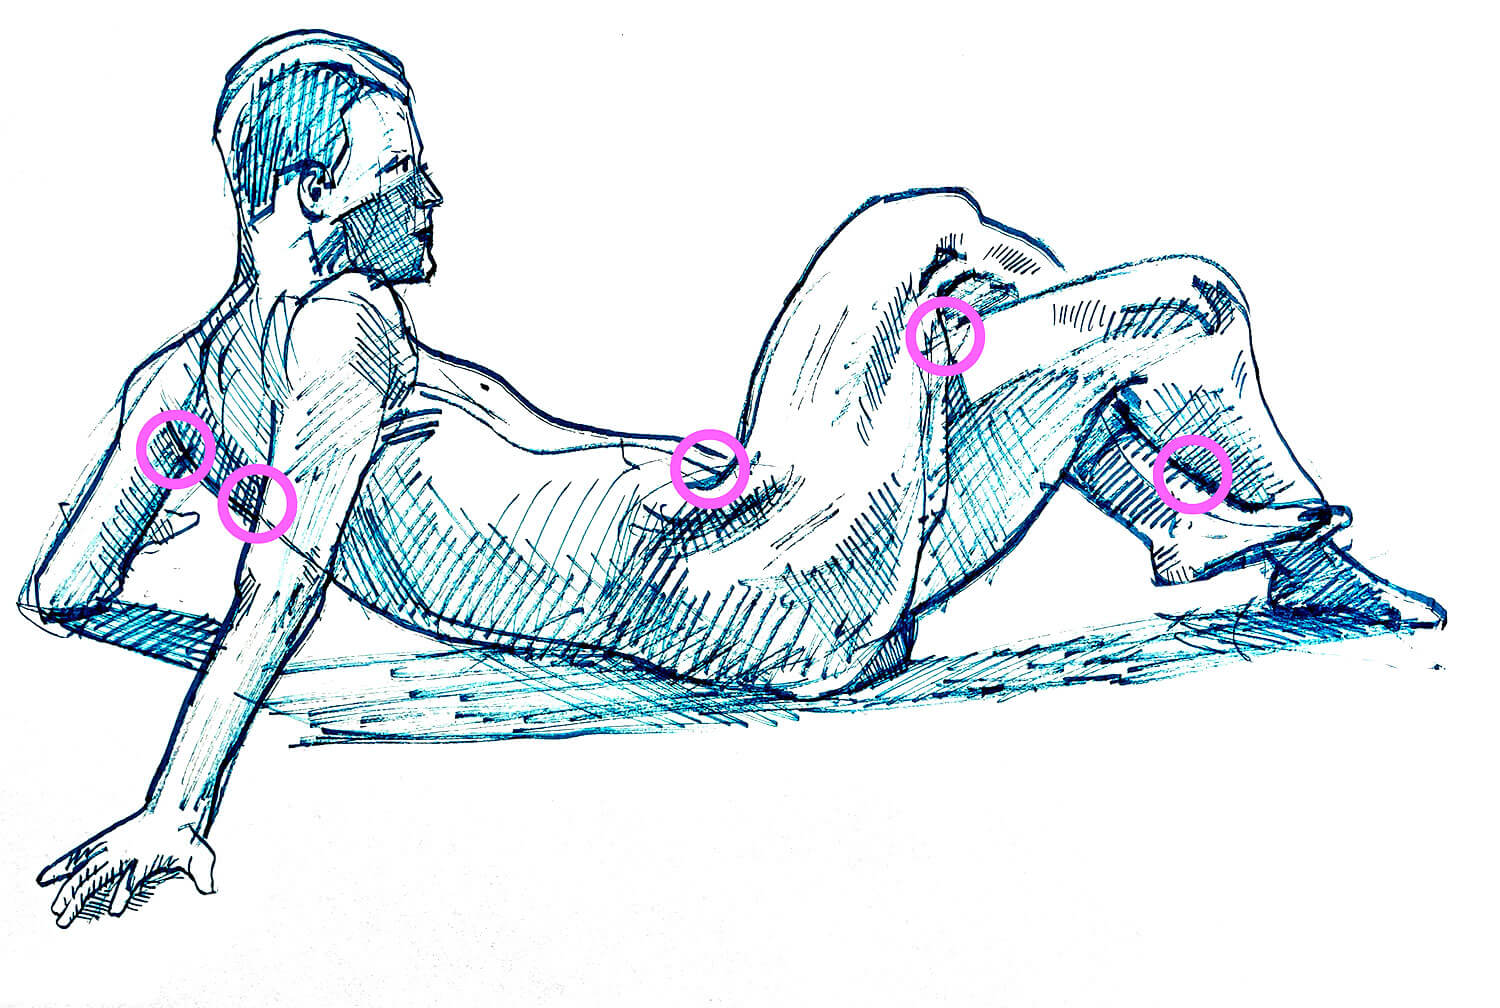
This is a recent life drawing in my sketchbook that shows the power of cross contour.

The form is described using controlled curved lines that wrap around the body of the apples.
If this is helping this article so far, I also have a YouTube channel, subscribe to The Portrait Guru if you’ll rather watch instead of read!
The next exercise adds depth.
And this is where these daily drawing exercises really start to feel properly three-dimensional.
Overlapping and depth lines
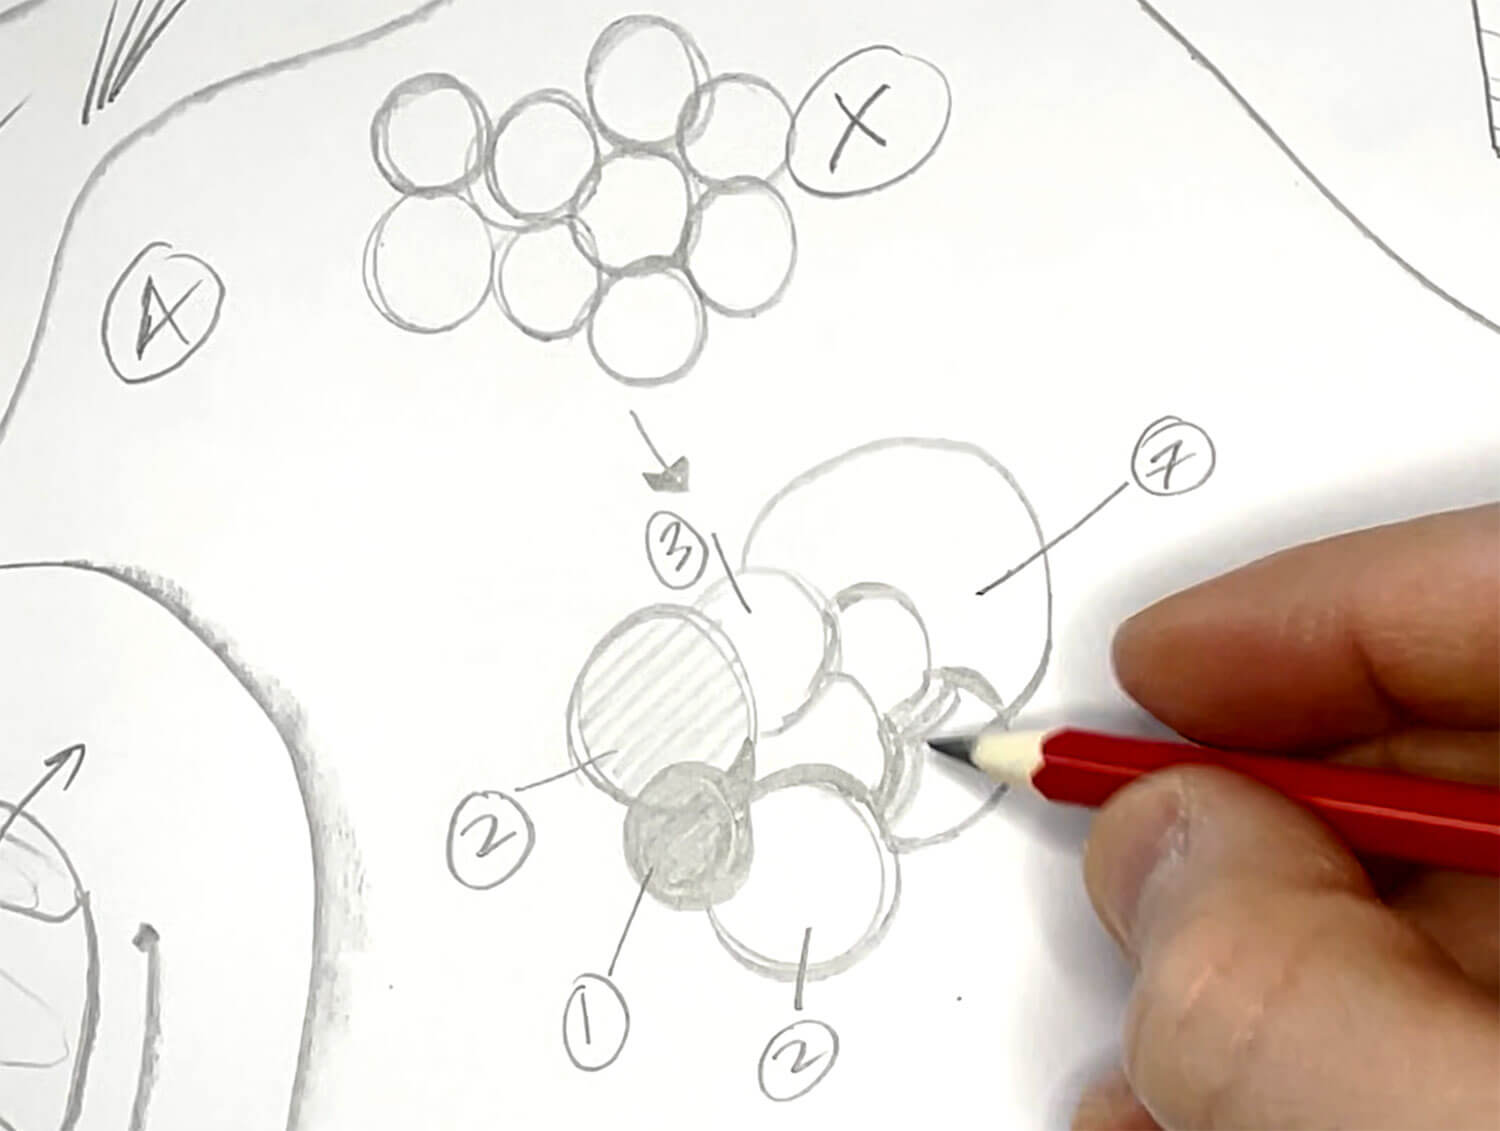
Draw a few circles all touching on the same plane.
Everything feels flat.
There’s no sense of depth. Now redraw them so they overlap. Let one clearly sit in front of another. Use thicker lines on the forms closer to the sphere.
Thinner lines as the forms recede. let some edges disappear slightly when they turn away.
This is what I constantly think about when creating my illustrations.

Overlapping instantly creates depth, even without having to shade, render, or even add any detail.
It’s one of the fastest upgrades you can make to your drawings.
Add some subtle shadows to your circles, and look at the differences between the overlapping circles and the previous one. Look how much more dynamic they look.
It’s time to combine everything into one drawing.
This final exercise ties it all together.
Combined form exercise
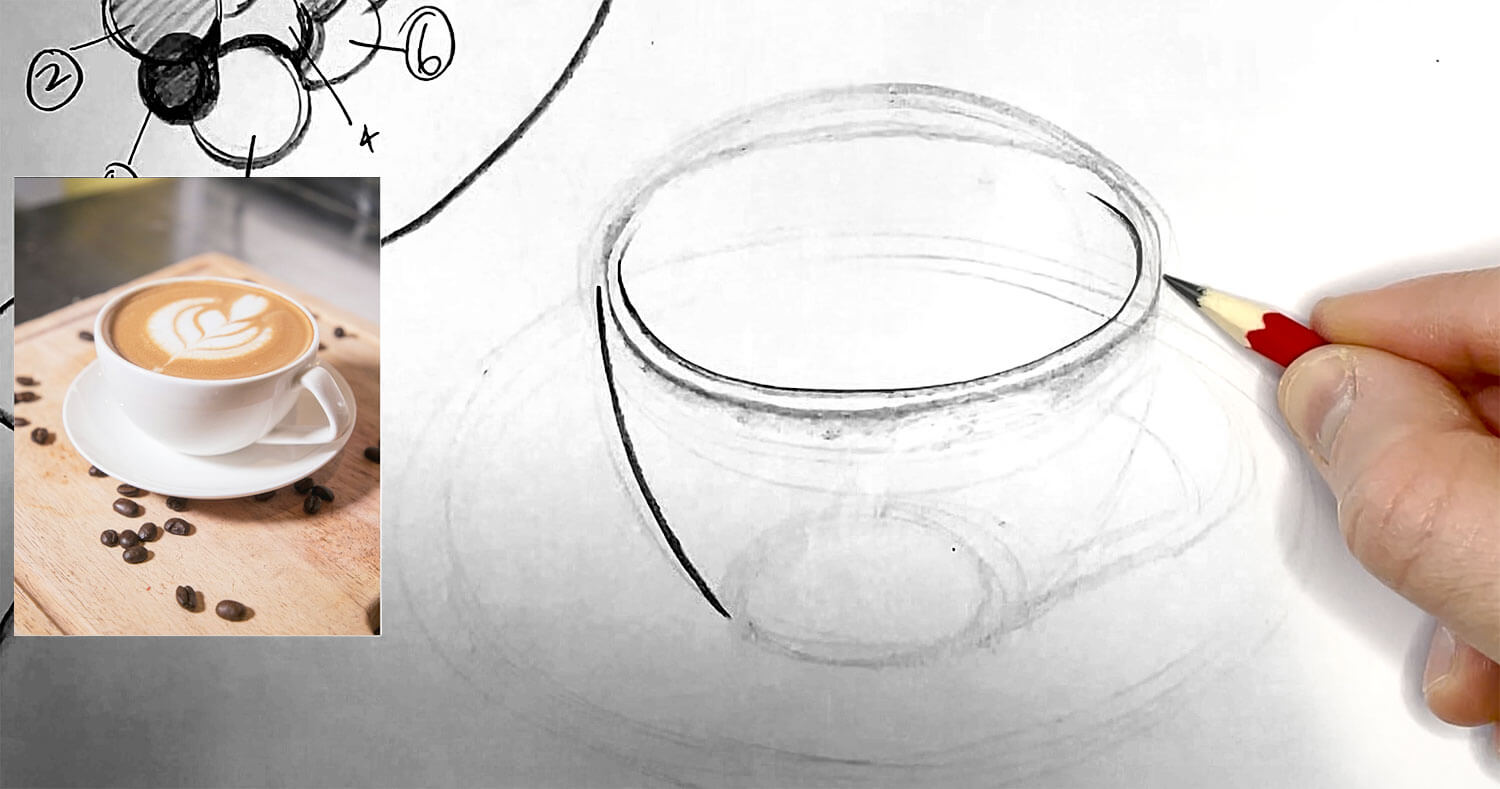
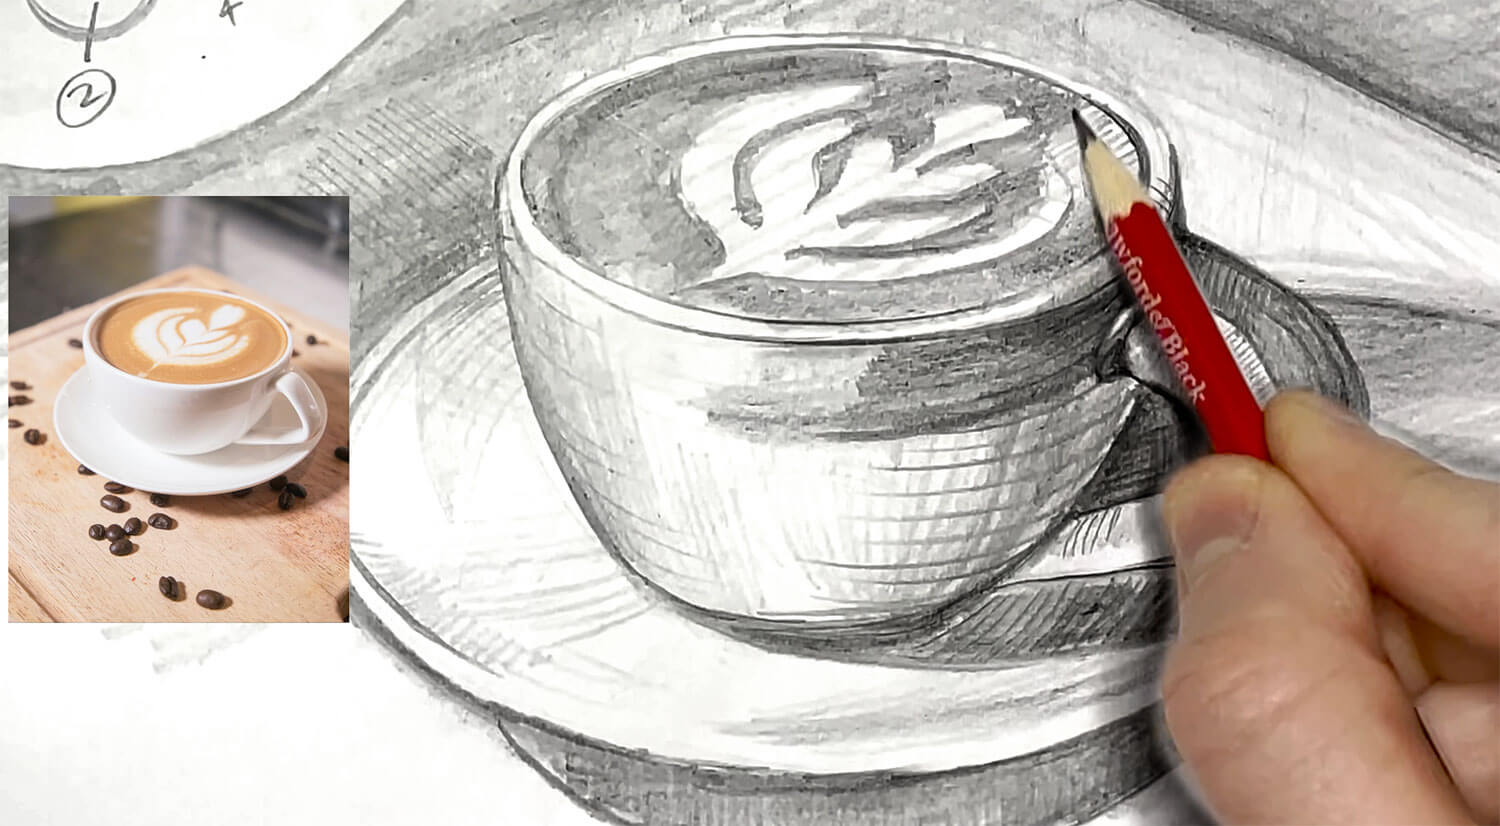
Start with a simple object. I’m drawing a coffee mug.
Start with basic shapes, and draw a circle for the top, a curved shape for the handle, and a cylinder for the base.
Make sure the handle overlaps the mug clearly so it feels attached, not just pasted on it.
Now add cross contour lines that describe the form.
Let them wrap around the mug and follow the curve of the handle. Use line weight intentionally.
Use thicker lines where forms are closer, lighter lines as the surfaces turns away from the viewer.
Remember, taper your lines for better line quality. If you shade, follow the form of the subject. Let the strokes wrap around the mug and shade going from light to dark.
Don’t fill everything evenly.

Think in planes and directions. Make sure you have patience whilst you’re drawing. And also have fun with it as well.
One of the fastest ways to improve your drawing accuracy is to draw upside down.
This is a simple drawing hack that you should try.
When you flip a reference, even something simple like a mug, your brain stops labeling it as a mug, and it starts seeing pure shapes, angles, and distances.
That’s what we want. You’re no longer drawing what you think a mug should look like. You’re drawing what’s actually there. This pairs perfectly with measuring.
Use your pencil at arms length to compare proportions. Check how wide something is compared to its height. Measure where landmarks line up horizontally and vertically.
For example, where the handle of the mug sits in relation to the top of the mug.
This one exercise uses everything you’ve practiced.
Confident tapered lines, contour, organic flow, overlap, and depth.
Conclusion
Spend a few minutes on each exercise, and your drawings will start to feel more solid, more confident, and believable.
- Spend a few minutes on each exercise to build confidence and control in your lines.
- Use cross contour lines on boxes and organic shapes to give your drawings a sense of 3D form.
- Add overlapping shapes and vary line weight to create depth and dimension.
- Combine all techniques in one drawing for a complete, believable form.
- Practice deliberately, measure proportions, and draw what you actually see.
If you liked these daily drawing exercises, check out these tips to help improve your portrait drawings.
Otherwise check out this video below or check out these illustrations.
Many thanks for listening and visiting my blog today. You can follow what I’m up to on my Twitter, Facebook, or Instagram pages, I’ll really appreciate it if you do, and don’t be afraid to say hi to me! Many thanks again, and have a great day!

 4th February 2026
